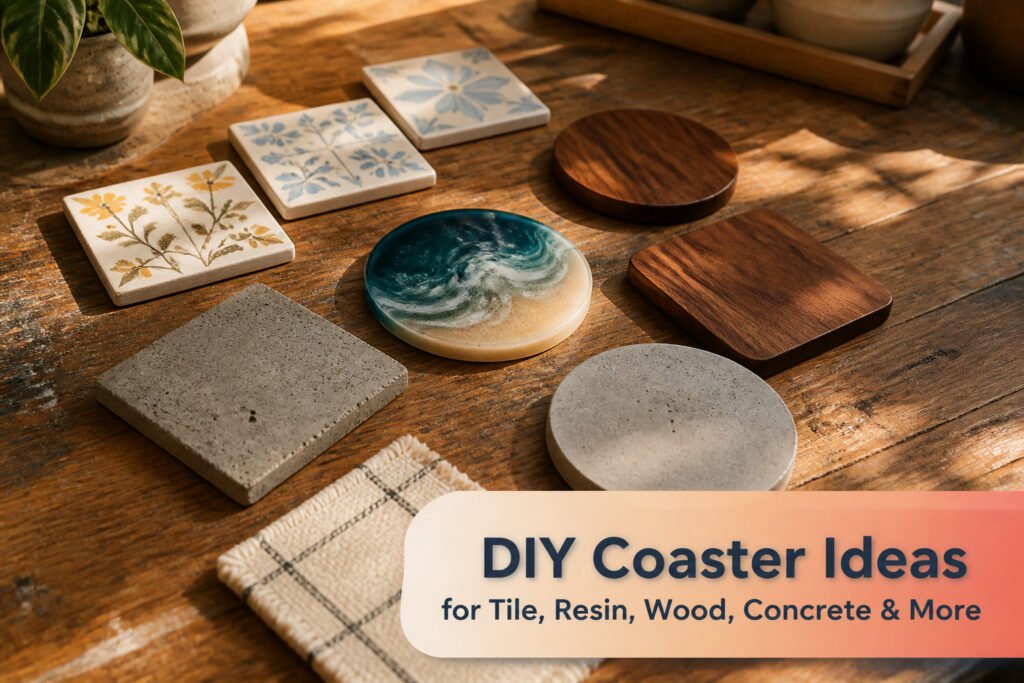
DIY coasters span from thirteen-cent ceramic tiles to multi-day resin pours, and the right project depends almost entirely on how much drying time your weekend allows. Fabric coasters finish in fifteen minutes if you already own a sewing machine; resin demands up to a week before the surface cures hard enough to survive actual use. That timeline, not the upfront cost, is what trips most first-timers.
1. Tile Coasters
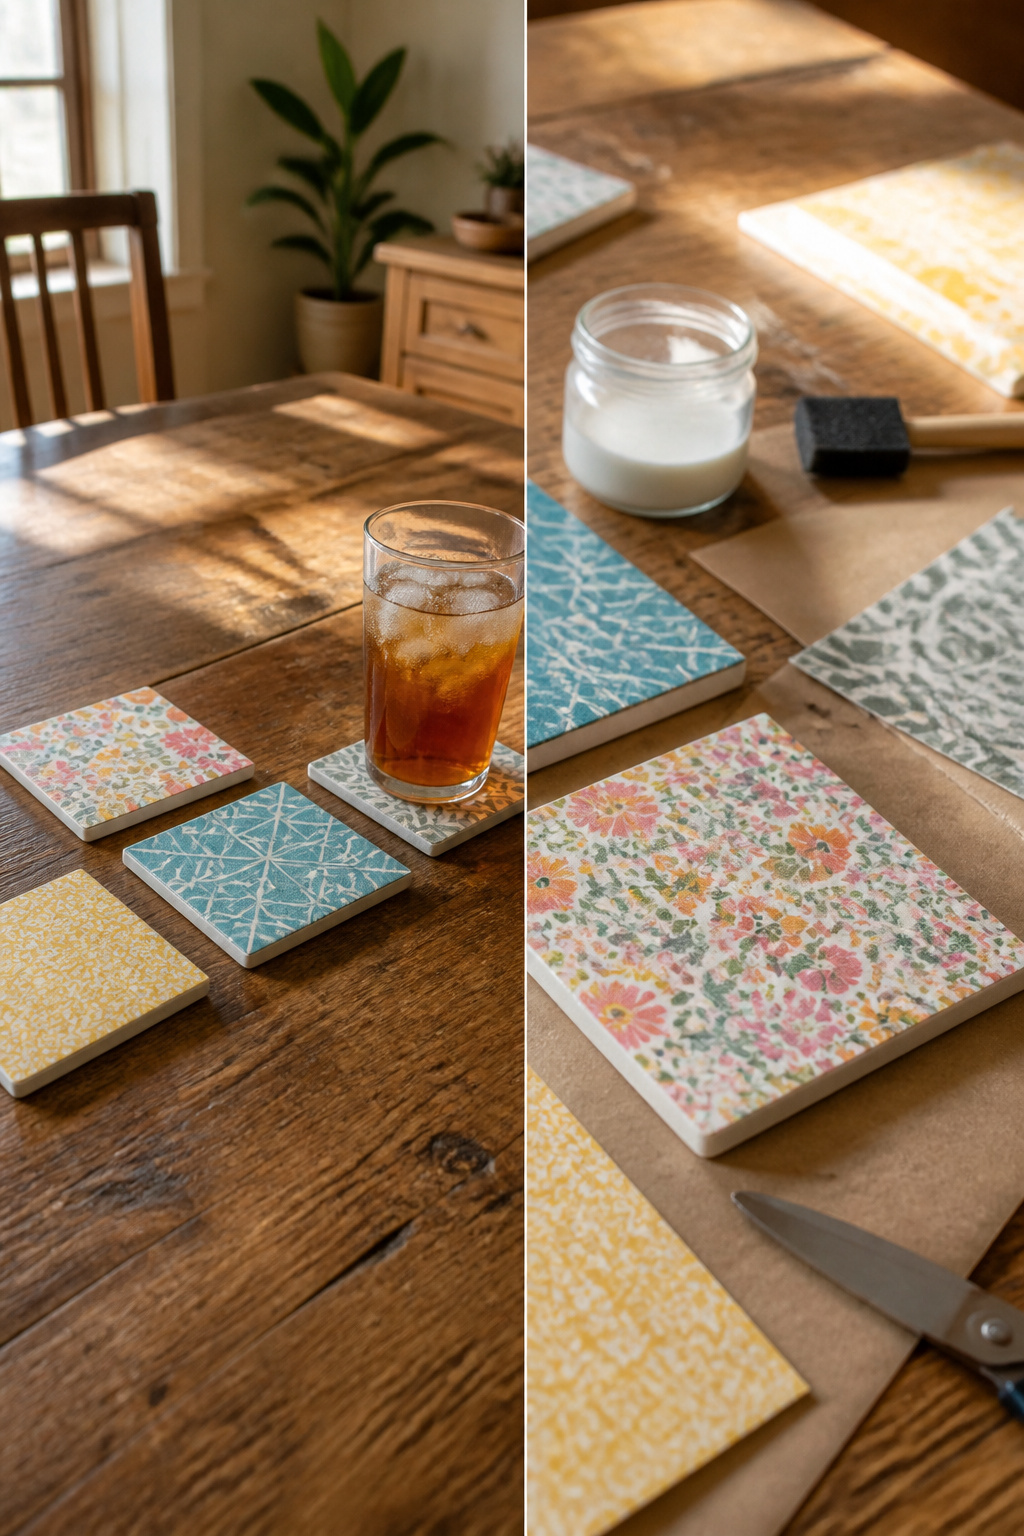
Basic 4-inch ceramic tiles run about 13 cents each at Home Depot, which makes tile coasters the cheapest entry point in this list. I like that the surface is already flat and finished; you are not building a coaster so much as decorating one.
The usual move is a piece of scrapbook paper or a photo held down with Mod Podge. Brush a thin, even coat onto the tile, lay the paper flat, and smooth from the center out. Thick glue will wrinkle the paper, so thin coats win here. Give each layer 15 to 20 minutes to dry before the next one. Two or three coats of Mod Podge over the top seal the image. Finish with spray acrylic sealer so a sweating glass does not stick to the paper. A single can of sealer costs around $7 and lasts for years of projects.
For backing, adhesive-backed felt from Hobby Lobby runs 99 cents and keeps the tile from scratching whatever surface it sits on. The whole project stays under a couple of dollars even if you ruin your first tile figuring out the glue thickness.
2. Photo Coasters
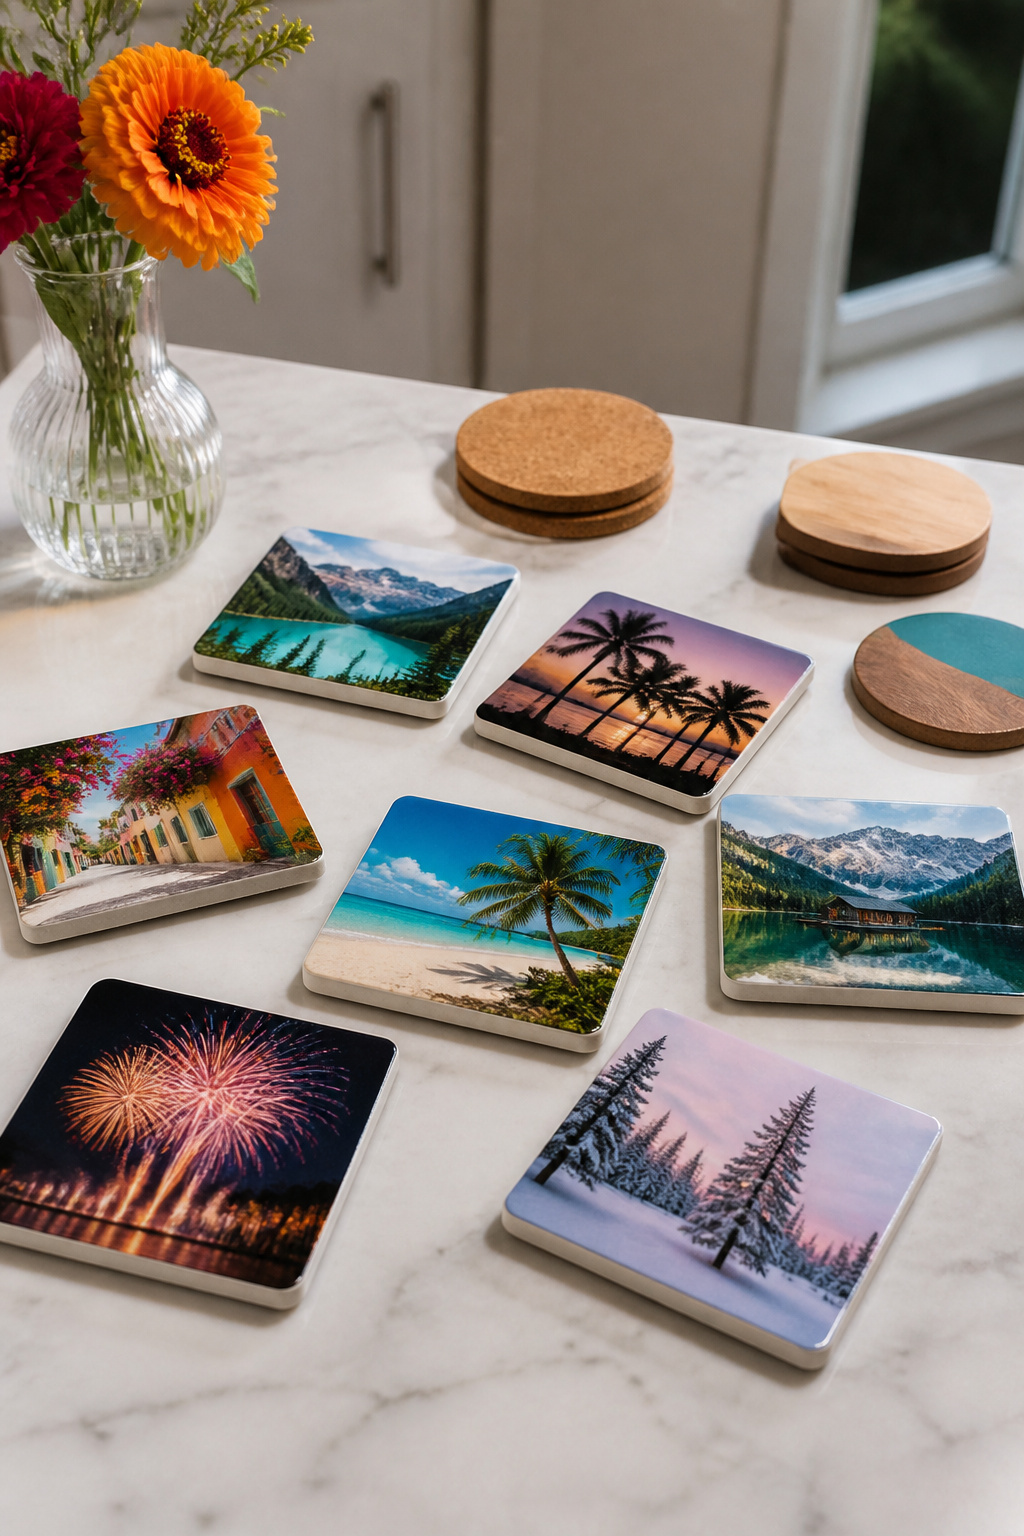
Personal photos turn a plain coaster into something that actually gets noticed on a coffee table. Mod Podge does the heavy lifting here: brush a thin layer onto your base, press the trimmed photo facedown or faceup depending on the look you want, smooth out bubbles, then add two or three topcoats with about twenty minutes between them. Tile, wood, and cork all work as bases, though wood and cork feel warmer in the hand and make better gifts for anyone who flinches at cold ceramic.
The finish matters more than the photo choice. Mod Podge is water-resistant, not waterproof, and standing water will cloud it over time. A final sealer is non-negotiable for something that holds drinks. Brush-on polycrylic or clear acrylic spray handles moisture fine; if hot mugs will sit on these, VHT Engine Enamel or a resin pour covers both water and heat. Polyurethane works too if that is what is already in the cabinet.
Whole project needs patience more than skill. Each Mod Podge layer takes twenty minutes, the sealer needs four hours between coats, and the final stack should sit untouched overnight before wrapping. That timeline makes these a plan-ahead gift, not a Saturday-before-Christmas scramble. Borrowing a photo from a friend’s social feed without telling them, then mailing the set, lands better than anything store-bought.
3. Fabric Coasters
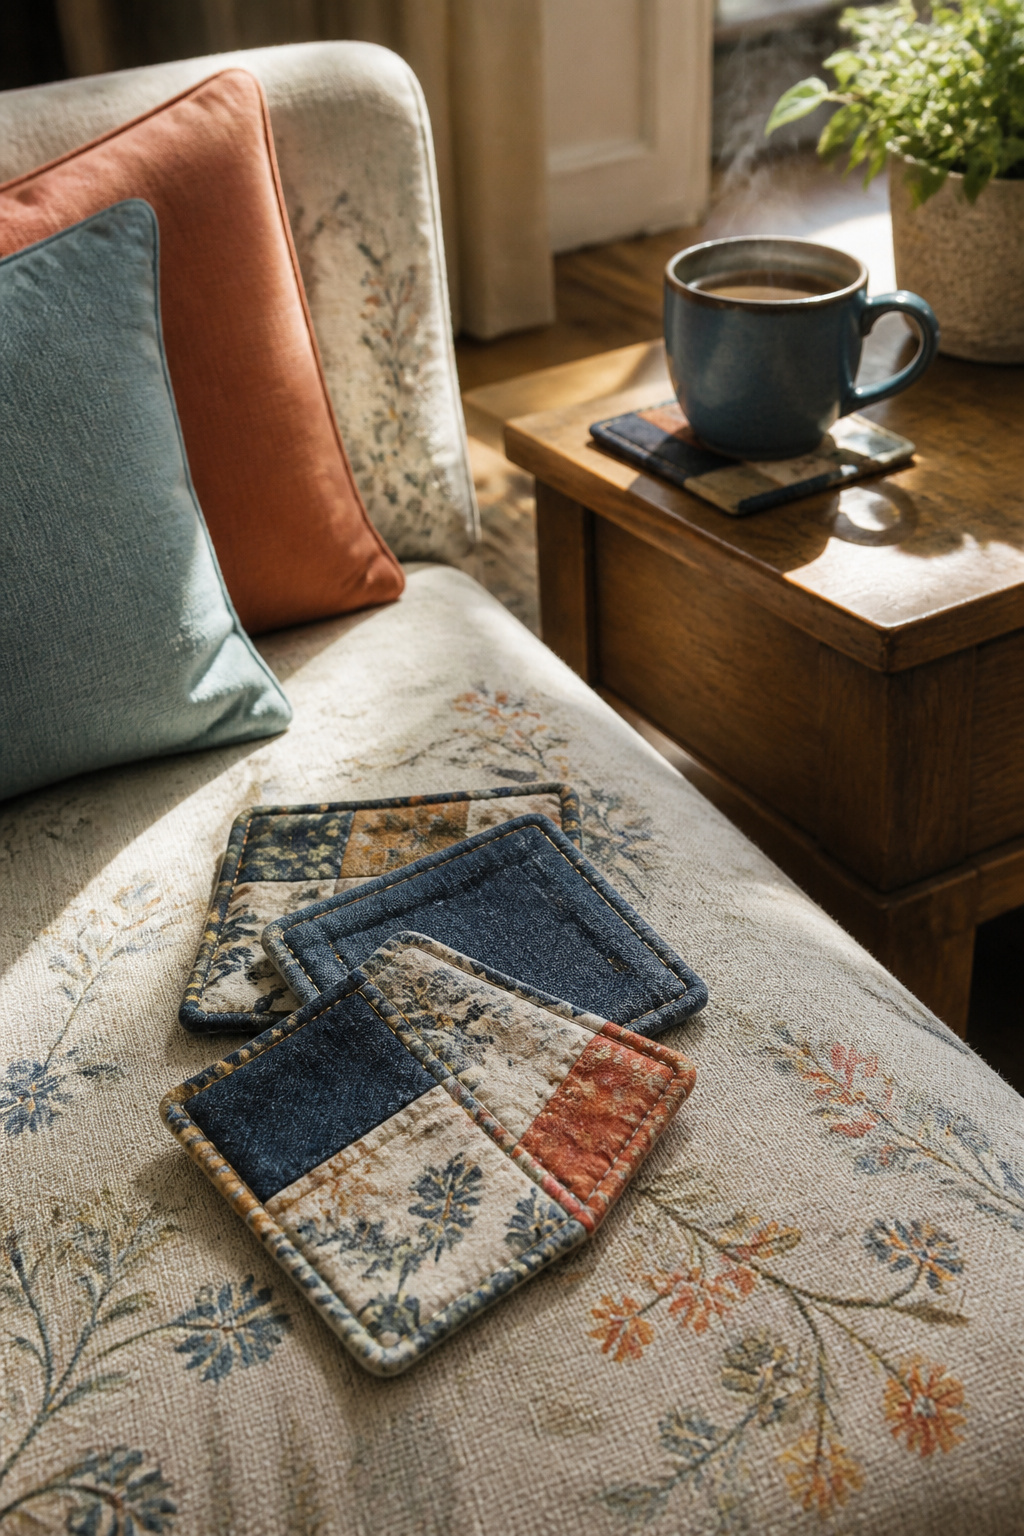
Fabric coasters are the entry point for anyone who owns a sewing machine and has never quite trusted it. Each one takes about fifteen minutes from cutting to finished edge, and that includes the learning curve on your first try. Cotton, felt, or denim all work; denim holds up longest under wet glasses, while cotton lets you match whatever pattern already lives on your couch.
The construction is straight-stitch simple. Cut two squares, sandwich them right-sides together, leave a gap for turning, then press flat. For the edge, bias tape gives a cleaner look than a raw zigzag, though zigzag finishes faster and forgives wobbly seams. Either way, the coaster ends up padded enough to protect a table without the bulk of quilting.
What convinced me, reading through a dozen of these, is how deliberately they suit renters and first-home owners. The materials cost almost nothing if you are already the sort who keeps fabric scraps. The finished piece looks intentional, not apologetic, in a way that bought coasters at the same price point rarely manage.
4. Resin Coasters
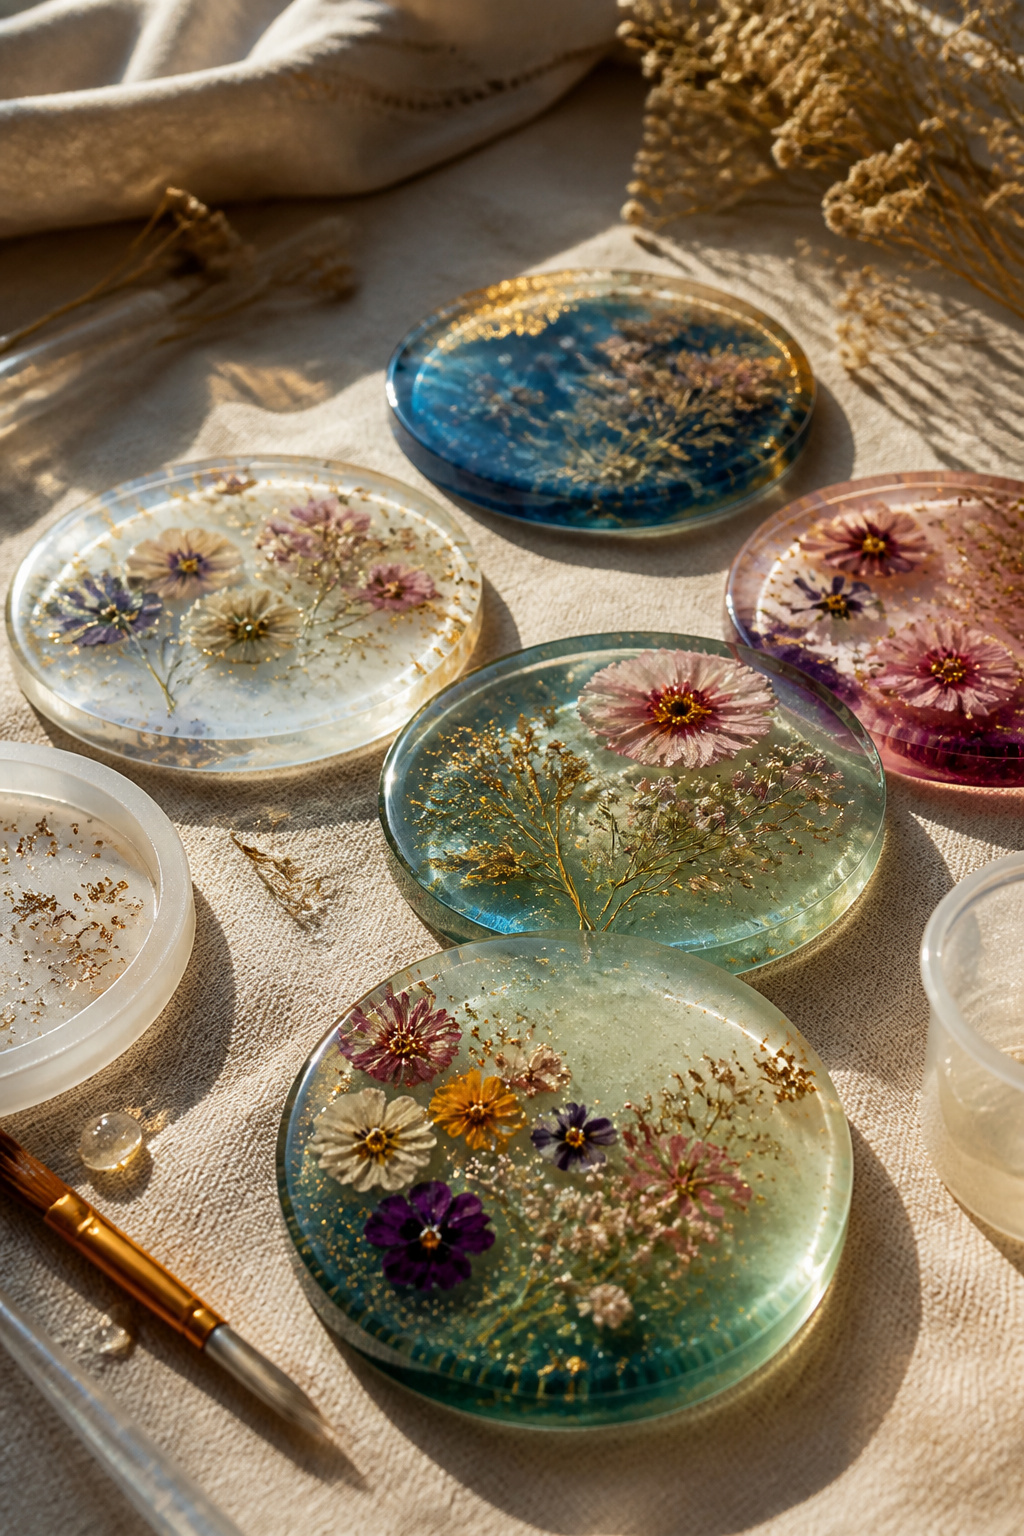
Resin gives coasters a glossy, glass-hard finish that survives actual coffee rings and condensation, and silicone molds let you cast shapes that would take serious woodworking skill to cut by hand. I have watched enough tutorial videos to know the setup is fussier than it looks. You need a level surface, a dust cover, and patience: most pours need 24 to 72 hours to cure fully, and rushing it leaves fingerprints or cloudiness you cannot sand away. The payoff is embedding almost anything that stays flat. Dried flowers work if they are fully desiccated, any moisture bleeds brown into the clear resin. Glitter suspends beautifully if you pour in thin layers, letting each gel before the next. Colorants, alcohol inks, and even terrazzo-style chips of colored clay all read clearly through the depth. What convinced me, reading through a dozen of these, is that a first timer should skip the fancy additives and start with a simple clear pour in a basic round mold. Get the bubble removal down, a small torch or even a long-necked lighter passed quickly across the surface, before you invest in dried blooms that turn to mush.
5. Cork Coasters
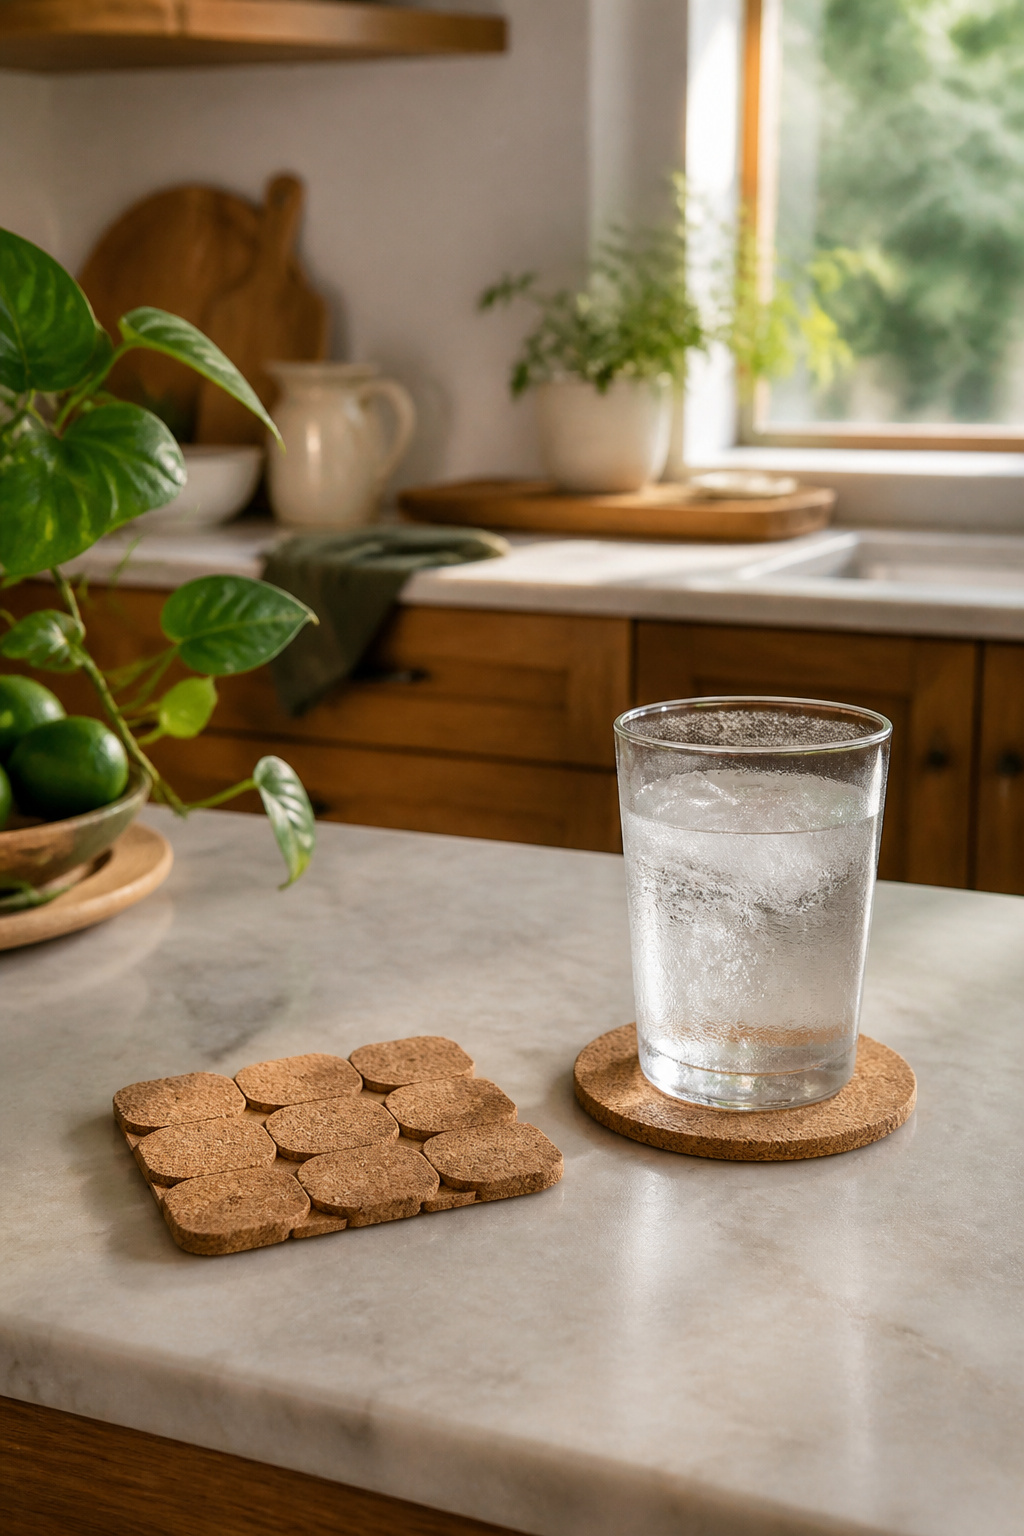
Cork coasters fall into two camps, and the choice depends on whether you drink wine faster than you tackle projects.
A sheet of cork from the craft store cuts clean with a sharp utility knife. I trace a drinking glass for the circle, stack two or three layers for thickness, and bond them with plain white glue clamped flat overnight. The edges stay soft enough that sanding is optional.
Wine corks ask more patience. Standing them on end and gluing them into a tight grid gives that classic cellar-floor look, but the gaps collect condensation. Laying them flat and slicing crosswise into disks, then arranging the disks like penny tile, sits flatter and wipes easier. Either way, a glue gun works in a pinch though wood glue holds longer.
Cork absorbs moisture by nature, which is the point, but that same quality turns dark and musty over time. A clear acrylic spray sealer changes the lifespan entirely. Two light coats of something like Aleene’s Acrylic Sealer or a waterproof acrylic sealant on the top surface lets the cork still grip the glass while shedding the water that would otherwise soak in. Mod Podge alone stays tacky and clouds under standing water; it wants that final spray coat too. Skip the sealer and you will replace the set inside a year.
6. Wood Slice Coasters
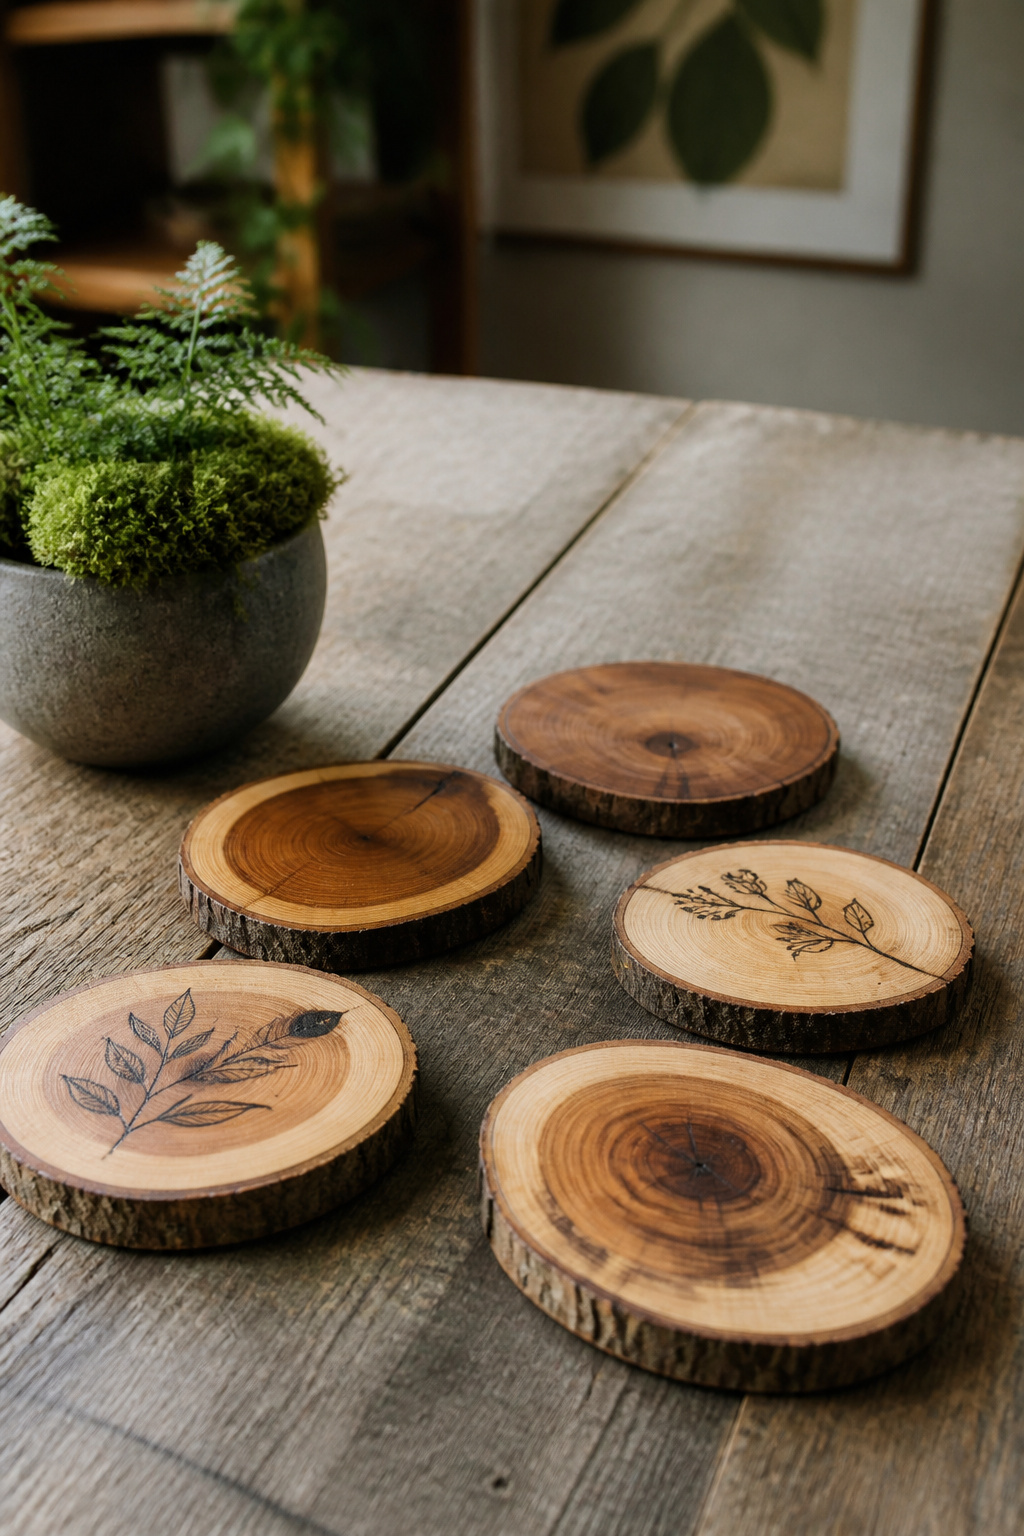
Cross-sections of branches or small logs make coasters with grain patterns no two pieces share. The rings, the checks, the way the bark holds or falls away: each slice arrives as its own small landscape.
Sanding is the work here. Start coarse and move through the grits until the surface feels smooth under a dry palm, not just under a fingertip. Edges need attention too, especially where the bark meets wood; a sharp edge will lift and flake later.
Polyurethane is the sealant that holds up to real use, water rings and all. Brush on thin coats, let each cure fully, and sand lightly between. Three coats is the floor for something that actually sits under sweating glasses.
Paint or wood burning can go on after the first seal coat so the surface doesn’t drink the color in unevenly. A wood-burned outline of the state you grew up in, a simple leaf shape burned into the ring pattern: small marks read better than busy ones.
The limit is thickness. Too thin and they warp; too thick and they feel like small stumps instead of coasters. Half an inch to three quarters sits right in the hand and still clears most glass bases.
7. Concrete Coasters
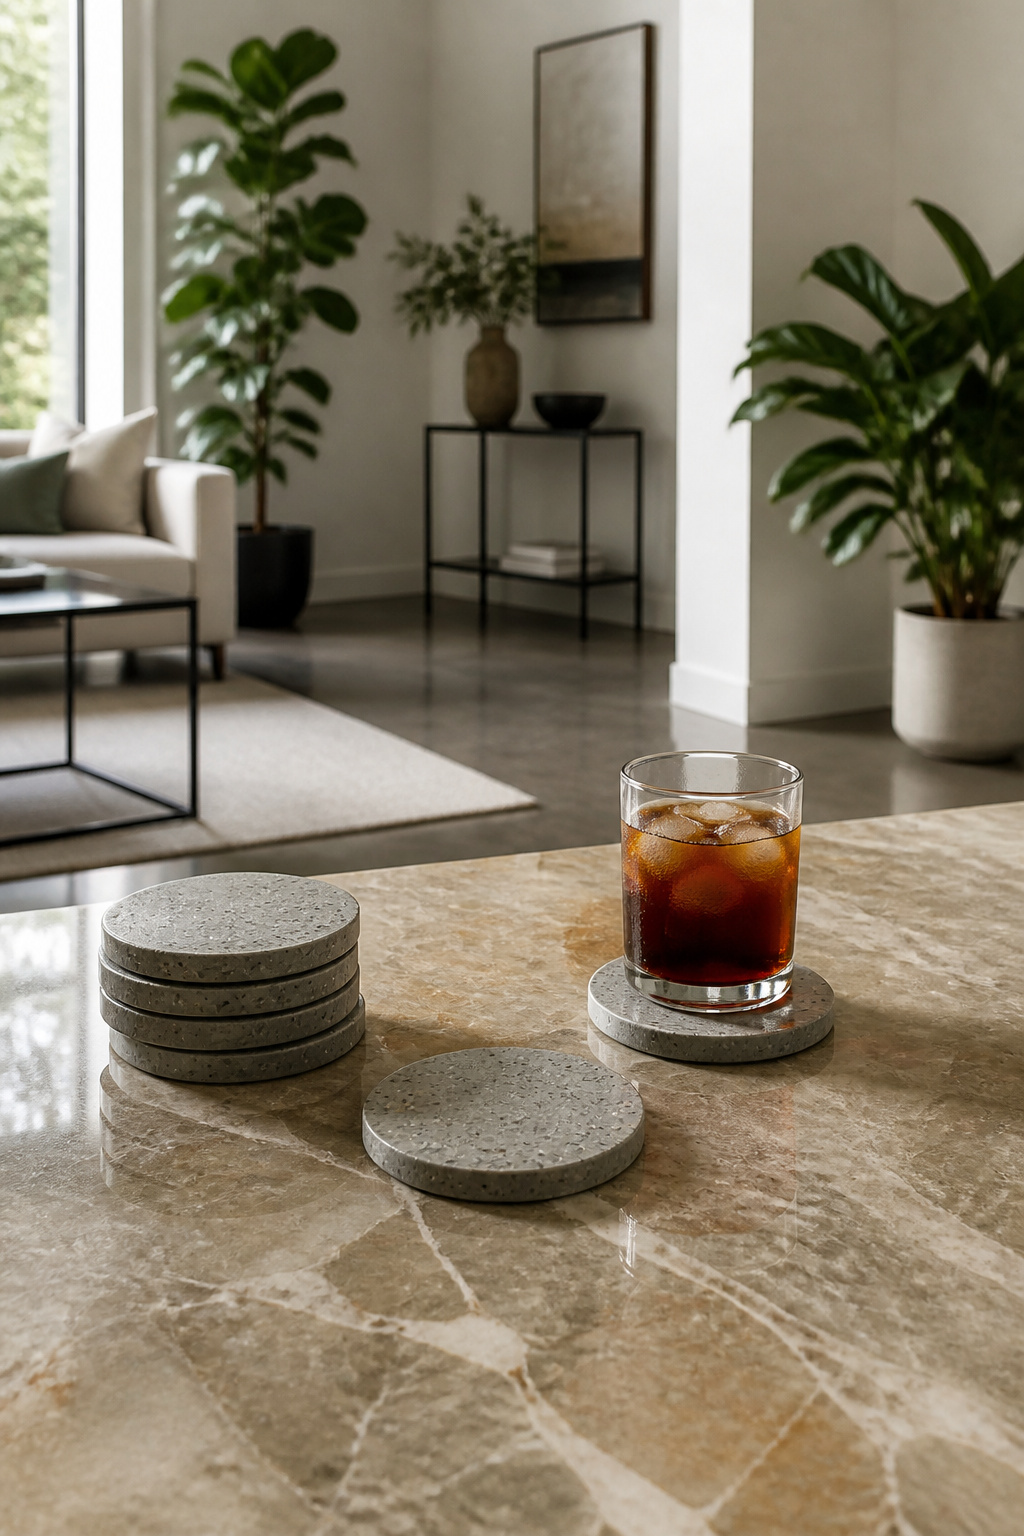
Concrete coasters trade the delicacy of other materials for heft and permanence. A batch mixes in something like a large yogurt container with a margin trowel, then pours into silicone molds that release cleanly once cured. Color comes from liquid pigments added during mixing or from dry powders worked in after a brief set, though the second route leaves streakier results. Small stones, pressed flowers, or brass letters can sink into the surface while the concrete is still wet, held in place with a gentle tap.
The finished piece weighs enough to stay put under a full glass of iced tea and survives drops that would crack ceramic. That same mass makes shipping them as gifts expensive, so concrete works best for keeping. Sealing with a food-safe acrylic finish prevents coffee rings and wine from etching the surface, a step worth doing before the first use rather than after the first stain. Polishing with fine wet-dry paper after demolding gives a satin sheen; skip it, and the texture stays rough enough to catch on paper napkins.
8. Comic Book Coasters
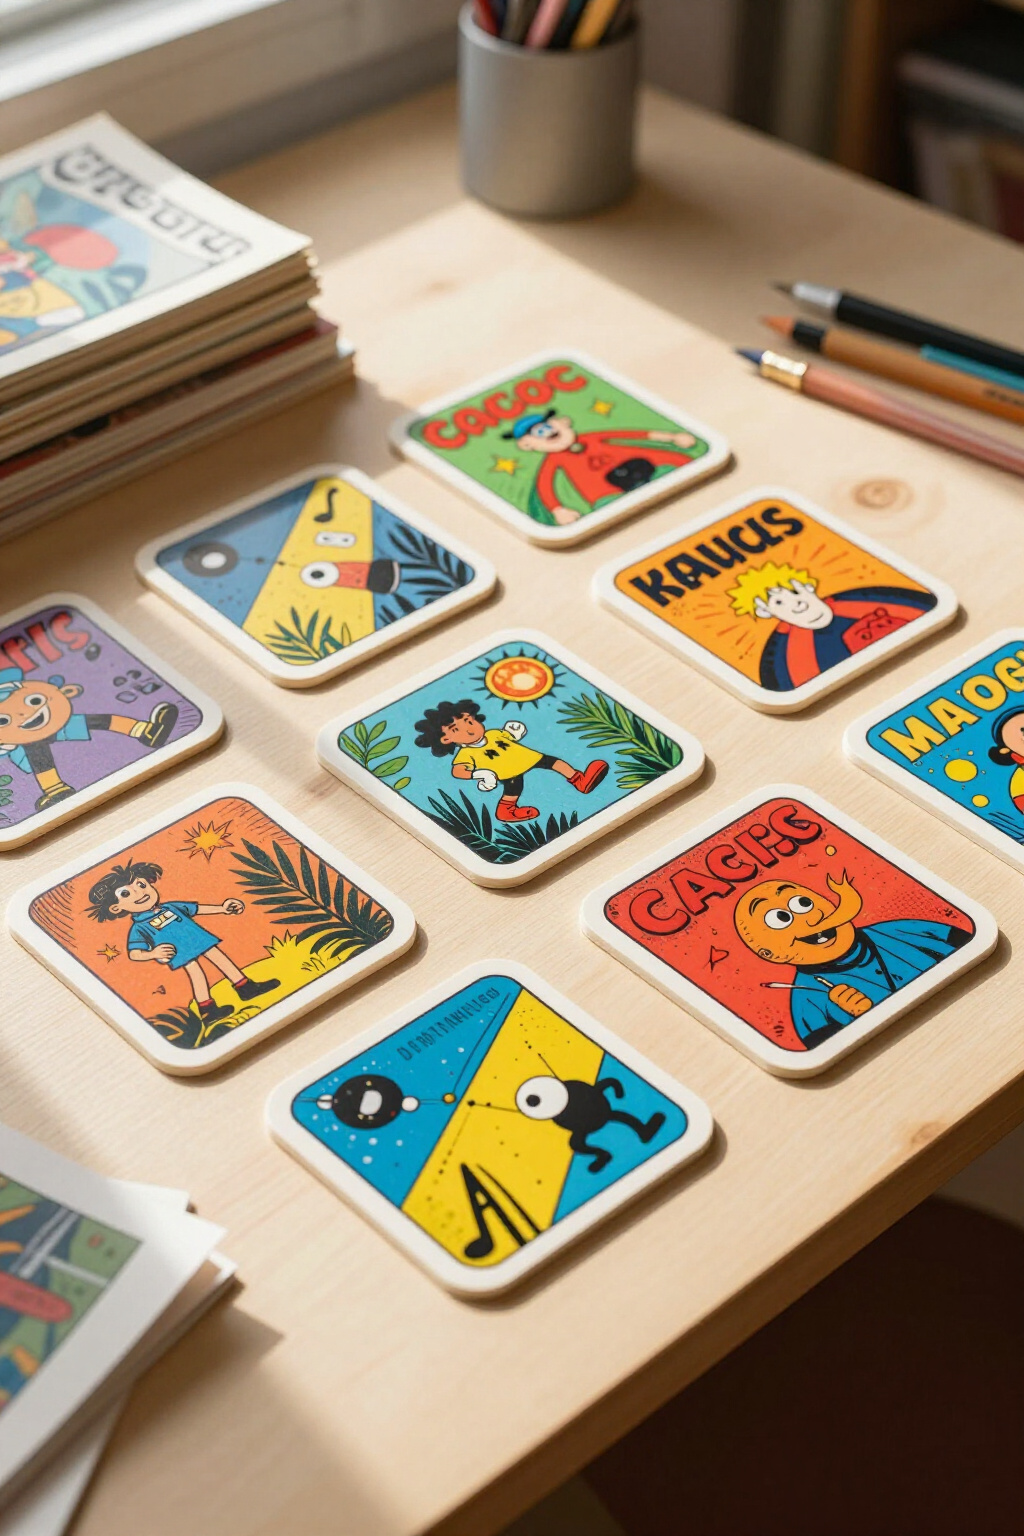
Comic book pages bring a different problem than family photos because the paper itself is thinner and the inks are laid down for shelf appeal, not for surviving a wet glass. Thinner stock wrinkles faster under Mod Podge, which is why graphic novels from the discount pile work better than flimsy monthlies. The color saturation is already pushed to comic-book levels, so a heavy sealant coat can muddy the reds and blues into brown; a light hand with acrylic sealer keeps the punch.
The copyright question matters more here than with snapshots of your dog. Old books in the public domain solve it cleanly, or you can buy secondhand without copying. The sealing rules do not change: spray acrylic sealer or polyurethane over the finished surface, let it dry completely, and add felt pads underneath so the backing does not scratch the table. Same steps, different source material.
9. Painted Coasters
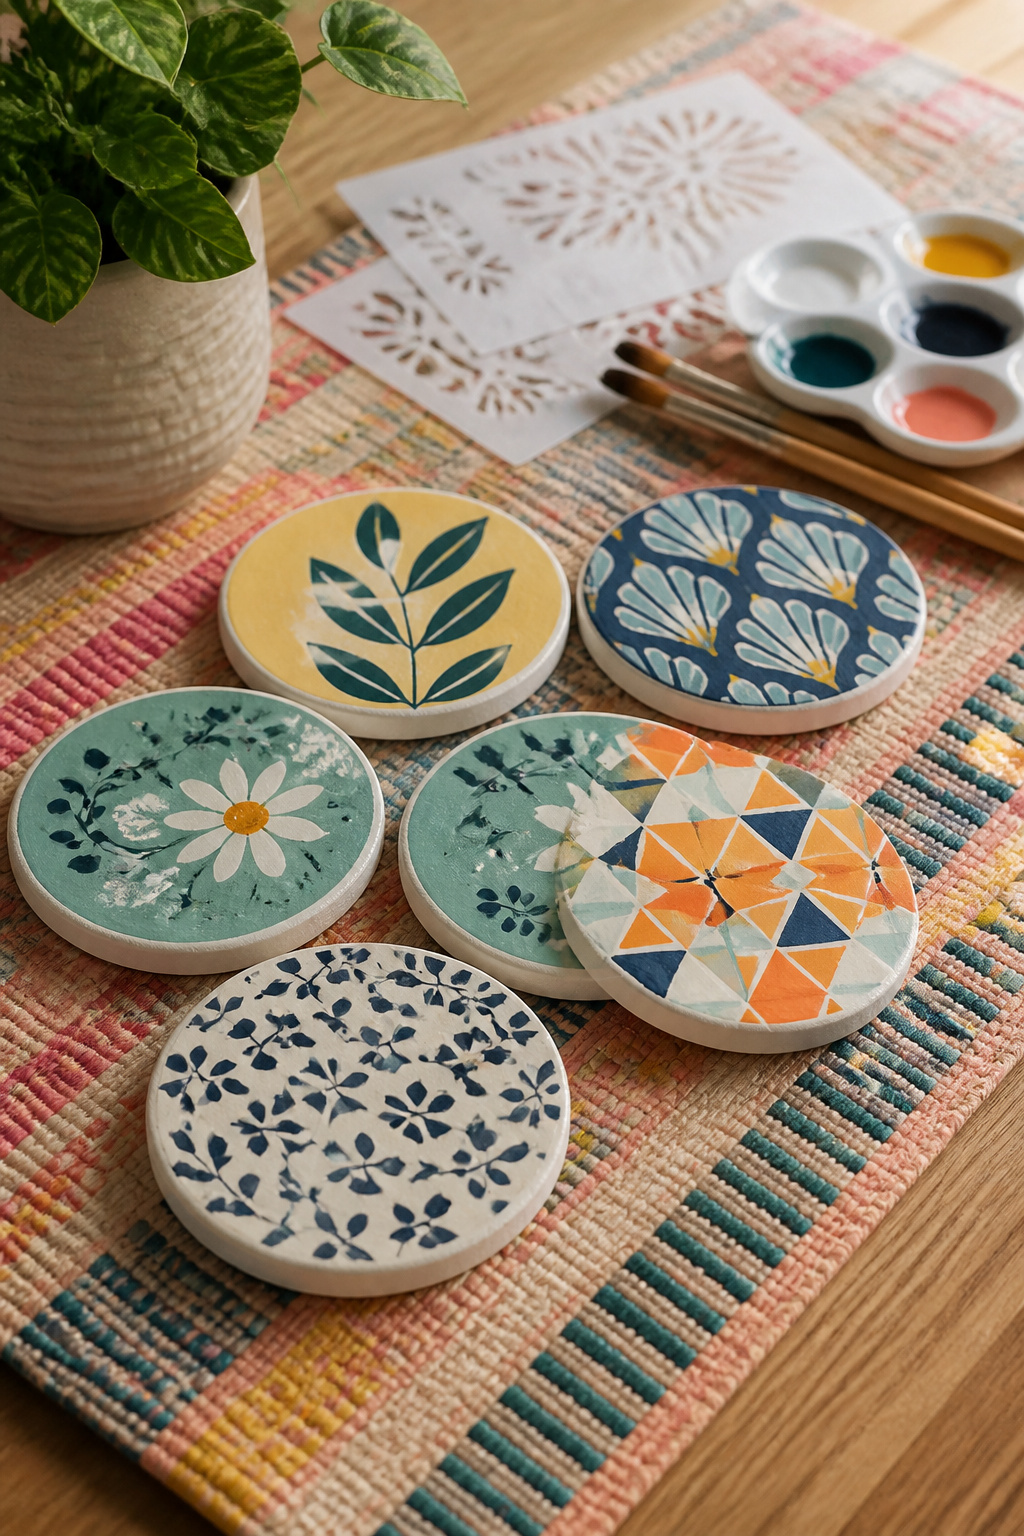
Painted coasters are where a five-dollar brush and a leftover tile turn into something that looks like it came from a shop in town. Ceramic tile takes acrylic paint well, though wood rounds or even cork sheets from the craft store work too. I keep a few stencils around for guests who swear they cannot draw a straight line; geometric patterns and botanical shapes hide shaky hands better than freehand lettering ever will.
Two coats of paint, letting the first dry to the touch, are usually enough. The part that saves the project is the seal. A spray coat of acrylic sealer outside, where the fumes stay downwind, gives the surface its gloss and keeps a sweating glass from lifting the color right off. Polyurethane brushed on in a pinch works too, especially if that is what is already on the garage shelf. Neither finish likes standing water left for hours, so seal the top and do not forget the sides where condensation creeps over the edge. Felt pads stuck to the bottom keep the table scratch-free and the coaster from sticking to the glass.
10. Upcycled Coasters
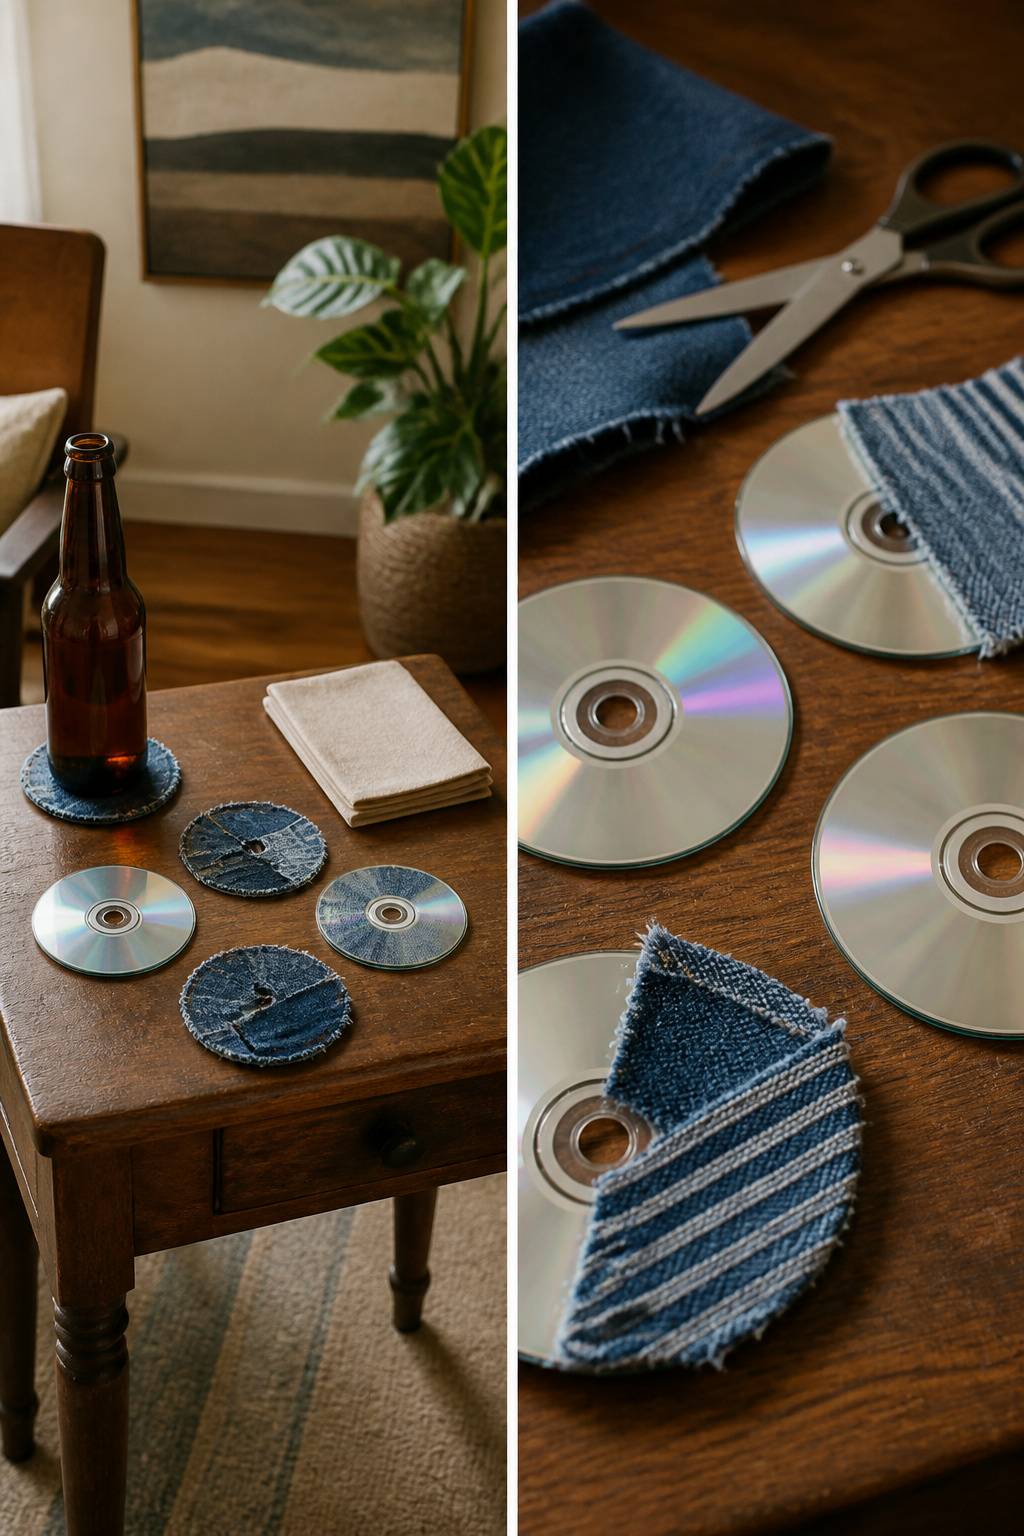
Old CDs make surprisingly good coaster blanks once you strip the label side. A cotton ball soaked in rubbing alcohol takes the printing off in about five minutes, and the polycarbonate underneath is already 100% waterproof; no sealing needed. The sources note you can decoupage paper on top or leave the rainbow diffraction bare, which reads as modern rather than recycled.
Denim scraps work best from the thick seams and hems, cut into strips and woven or coiled. No sewing required; a hot glue gun holds the shape. The texture is rugged, the absorbency is decent, and the zero-cost math is honest if you already own the jeans and the glue.
For either material, the bottom needs protection. Sticky-backed felt is the easier route, though ordinary felt plus spray adhesive works. What convinced me, reading through a dozen of these write-ups, is that skipping the felt is where the project fails: a bare CD or denim base will scratch a wood table faster than any condensation ring it prevents.
Materials and Costs
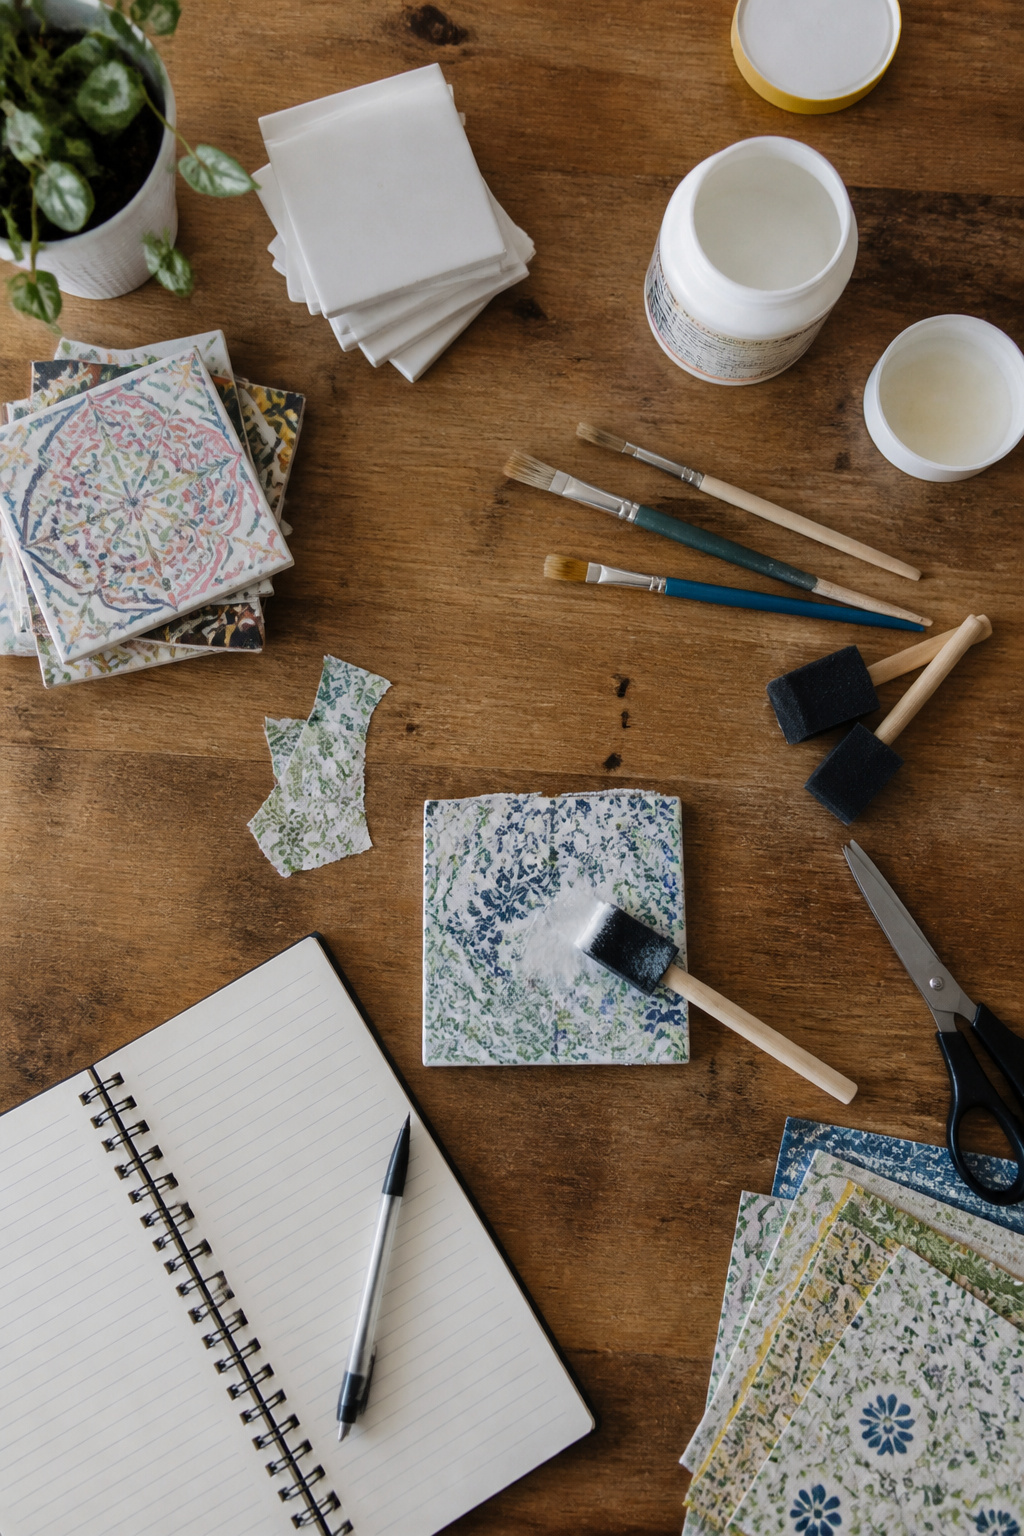
Most coaster projects pull from the same small pool of supplies, and a full set rarely breaks $10 if you already own a pair of scissors.
- 4-inch ceramic tiles run about 13 cents each at Home Depot; six tiles make a set for under a dollar.
- Mod Podge costs roughly $1 per batch if you mix it yourself, which is what I do now after seeing how fast the store bottles disappear.
- A foam brush is 69 cents at Michaels, though any old paintbrush works if you wash it fast.
- Acrylic sealer is the one real expense at around $7 a can, but that same can has lasted me through three years of sporadic projects.
- Adhesive-backed felt pads are 99 cents at Hobby Lobby and save your furniture from the raw tile edge.
Scrapbook paper or old maps cost next to nothing if you hunt clearance bins or reuse what you already own. Skip the fancy cork backing; the felt works fine and costs less.
Sealing and Finishing
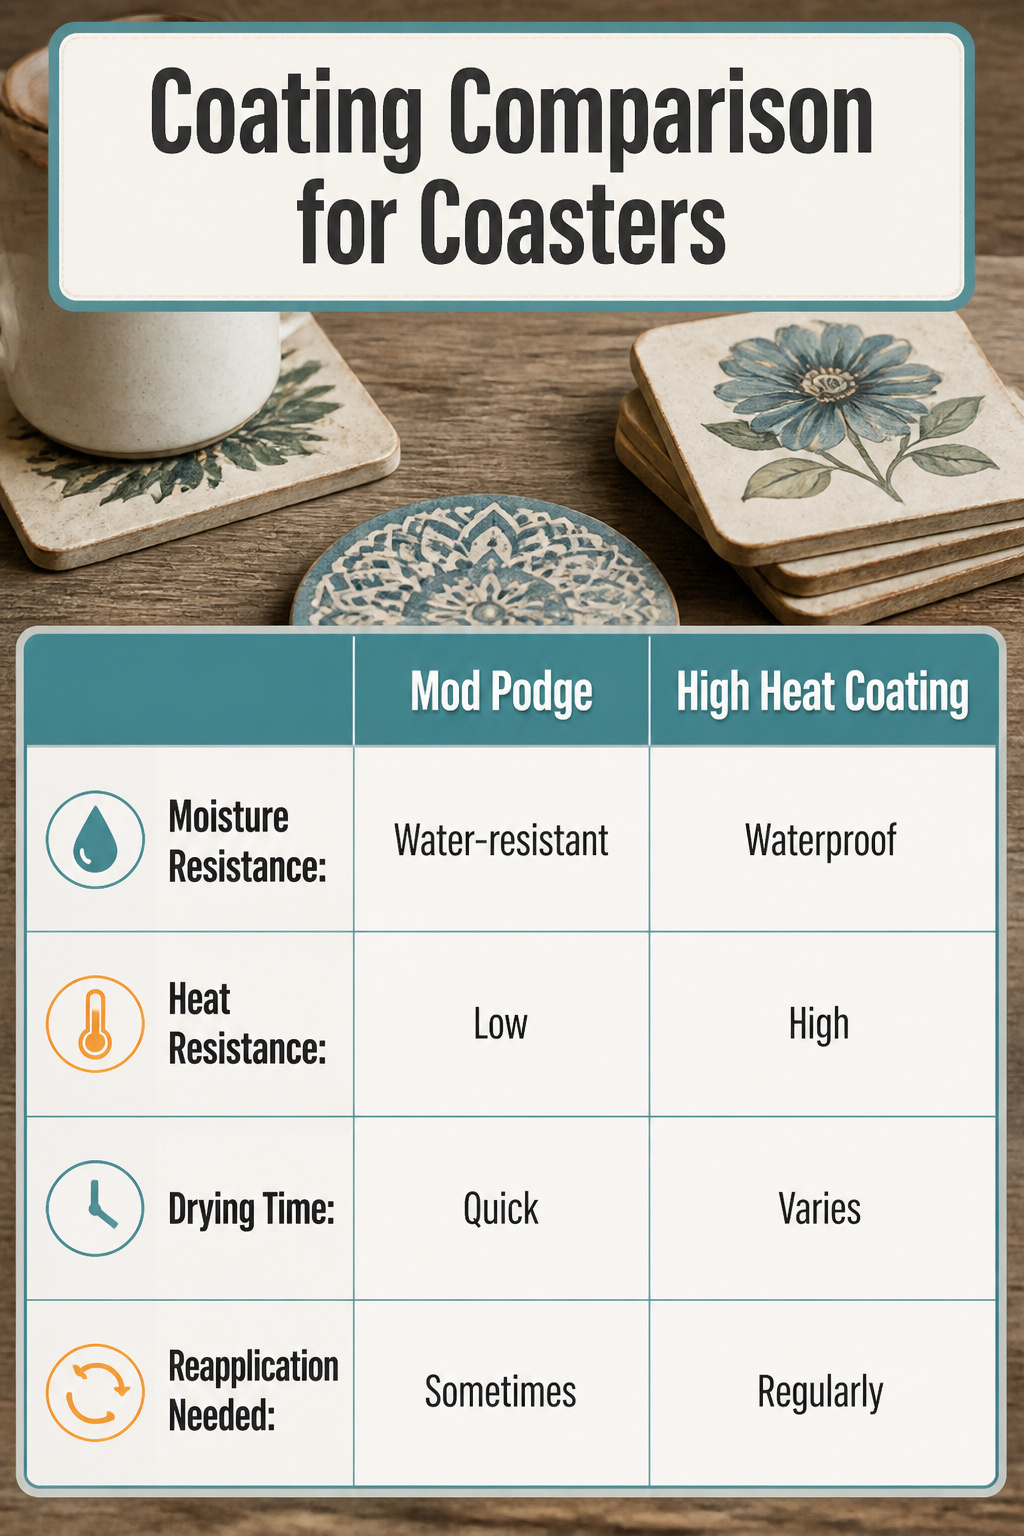
A coaster that looks finished can still fail the first time someone sets down a sweating glass. Moisture works through porous surfaces, and heat from a mug can soften finishes that were never meant to take it, so sealing is the step that decides whether the project lasts past the first weekend.
Mod Podge alone is not enough. It cures water-resistant, not waterproof, and standing water will eventually cloud the surface. It is also not highly heat resistant, which matters the moment someone sets a coffee mug straight from the microwave onto it.
For a final sealer, clear acrylic spray and brush-on polycrylic like Minwax both handle water, but neither handles heat well. If the coasters will ever see a hot mug, a high heat clear coating such as VHT Engine Enamel or a resin topcoat is the safer choice. Both are water and heat resistant. Drying times vary by product, so following the label matters more than any rule of thumb here, and reapplying when the finish shows wear will keep the protection intact.
Personalizing for Gifts or Decor
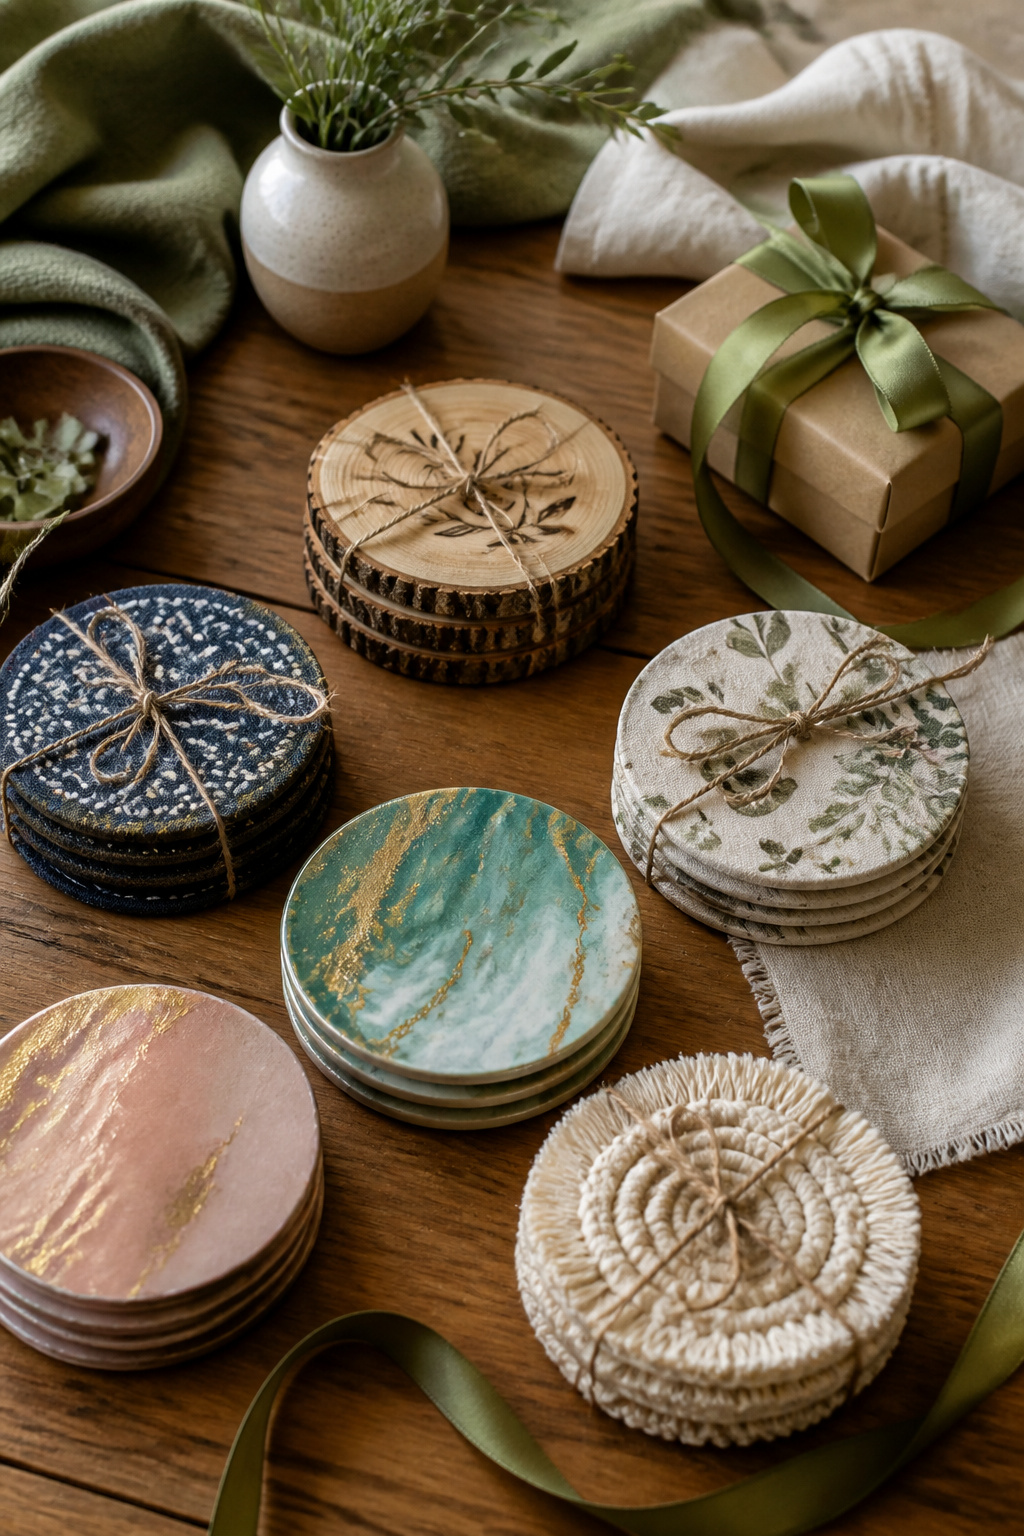
Batch production is where coasters stop being a one-off craft and start fitting a real weekend budget. Sewing fabric coasters in sets, cutting all your triangles at once, keeps each piece under fifteen minutes. The same logic holds for tile or photo coasters: one Mod Podge session, one sealing round, four to six gifts done.
Color matching is simpler than it sounds. Scrapbook paper in brown tones, clearance-rack coordinates, or seasonal hues lets the set read as intentional rather than random. For a wedding or housewarming, photo coasters or fabric prints carry the personal weight that store-bought sets miss.
Monograms work best on wood slices, where burning or stenciling one initial turns a backyard cut into something that looks packaged. A set of four reads complete; fewer looks like you split the pack. Wrap them in saved fabric scraps, and the gift covers itself.
Skill Level and Time
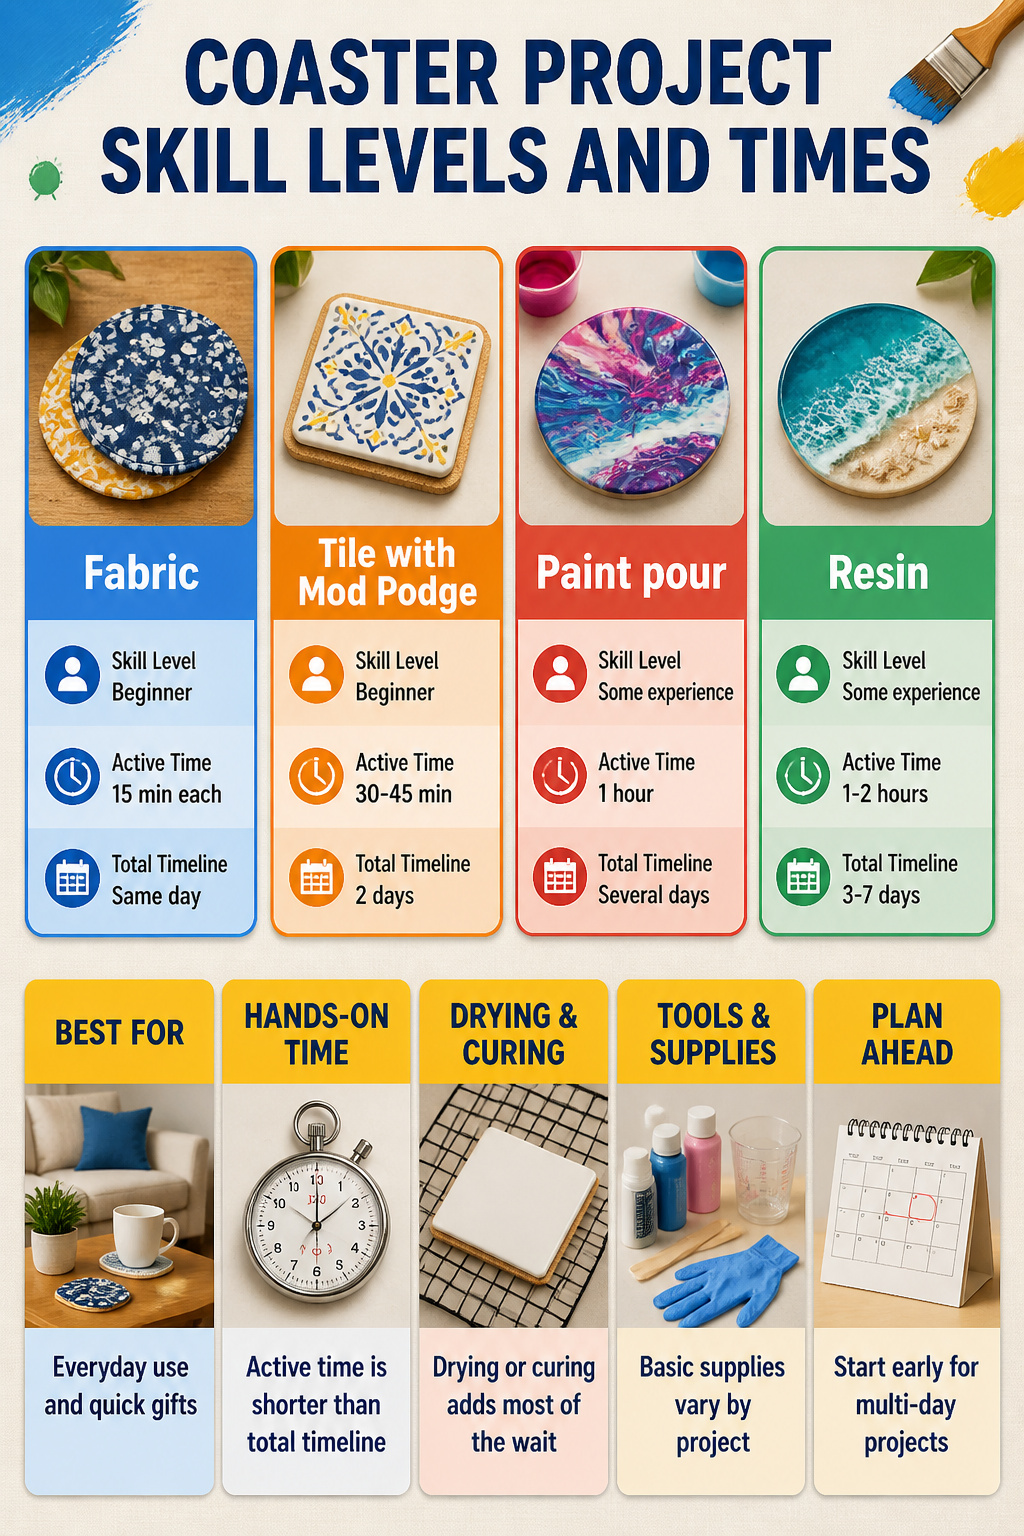
Not every coaster project asks for the same Saturday. Fabric coasters run about 15 minutes each once the cutting’s done, and batching them brings that down. Tile coasters with Mod Podge need overnight drying before the sealer goes on, so they eat two calendar days even if the hands-on work is brief. Resin stretches the longest: pour, wait for the cure, often another pour, another wait. Paint pour coasters fall somewhere past tile on patience, with long set times that make them a poor choice for a next-morning gift.
| Project | Skill Level | Active Time | Total Timeline |
|---|---|---|---|
| Fabric | Beginner | 15 min each | Same day |
| Tile with Mod Podge | Beginner | 30–45 min | 2 days (includes drying) |
| Paint pour | Some experience | 1 hour | Several days |
| Resin | Some experience | 1–2 hours | 3–7 days |
For a first timer with a free evening, fabric or tile wins. Resin and paint pour reward the wait, but only if you started early enough to let chemistry finish its half of the job.
Frequently Asked Questions
How do you make homemade coasters?
Start with a flat base like a 13-cent ceramic tile, a wood slice, or fabric squares, then decorate and seal. For tile, brush on thin coats of Mod Podge to attach paper or photos, let each layer dry 15 to 20 minutes, then finish with spray acrylic sealer. Add adhesive-backed felt underneath to protect furniture.
What can be used as a coaster?
Almost any flat, durable material works. The article covers ceramic tile, wood slices, cork sheets, wine corks, concrete, fabric, resin casts, old CDs, and even comic book pages sealed onto a backing. Each material needs the right sealant to handle moisture.
Is Mod Podge waterproof for coasters?
No. Mod Podge is water-resistant, not waterproof, and standing water will cloud the finish over time. It is also not highly heat resistant. You need a final sealer, such as clear acrylic spray, polycrylic, or a high-heat coating like VHT Engine Enamel for mugs.
How do you seal homemade coasters?
Apply a dedicated final sealer after any Mod Podge layers. Clear acrylic spray or brush-on polycrylic like Minwax handle water but not heat. For hot mugs, use VHT Engine Enamel or a resin topcoat, which resist both water and heat. Follow the product’s drying time on the label.