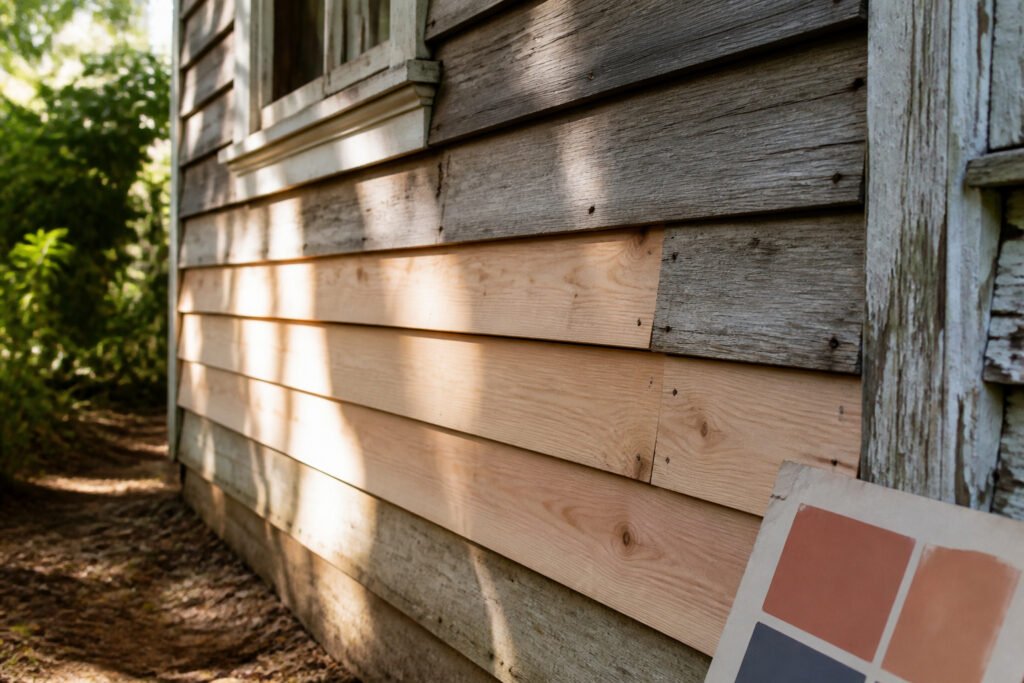
Tongue and groove siding is the interlocking horizontal boards that cover the outside walls of many older American homes, each board fitting into the next to shed water and hold flat against the wall. The catch is that replacing it without tearing off the whole wall means cutting the back lip off the groove on your new board so it can hook over the existing tongue below it, a detail most guides skip entirely. I learned the hard way that a 20% lumber overage is not optional; cedar arrives in random lengths, and one board two feet short of your gable end becomes scrap, not siding.
Figure Out How Much Lumber You Need

Walking the perimeter with a piece of chalk in hand turns up more damage than you expect. Soft spots hide under peeling paint, and rot loves the bottom course where splashback sits. Mark every board that needs to come out, then measure the total linear feet of those marks. Add 20% to that number before you order. Lumber suppliers sell cedar in random batches, not uniform sizes. One board runs 12 feet, the next might be 10 or 14, and you cannot cherry-pick the lengths. That variation eats a tight estimate fast. A board two feet too short for the gable end becomes scrap, not siding, and the project stalls while you chase one more piece. The overage covers the mismatch between what you measured and what shows up on the driveway.
Gather Your New Lumber

Matching old tongue and groove siding starts with knowing what you’re looking at. The wood might be knotty or clear, smooth or rough-sawn, and the tongue itself comes in more than one profile shape. A new board with the wrong groove won’t seat into the existing course, so cut a full piece from your damaged area and carry it with you.
Check the stamp or mill mark on the back face, usually found near one end. Width, thickness, and species should all be there, though weathering fades some stamps to illegibility. On my own house, boards on the south and west walls ran thicker than the rest; a sample from the easy-to-reach north side would have sent me home with the wrong stock entirely. Measuring the tallest board you need matters too, since suppliers stock cedar in runs up to 16 feet and shorter lengths won’t cover a full gable end.
Old-growth clear cedar has become scarce at local yards. When the original species is gone, you have two honest choices. Source from a specialty mill that still carries it, or switch species and accept that the repair line will read slightly different in grain and color. Either beats installing boards that don’t actually fit.
Pry Out the Old Boards
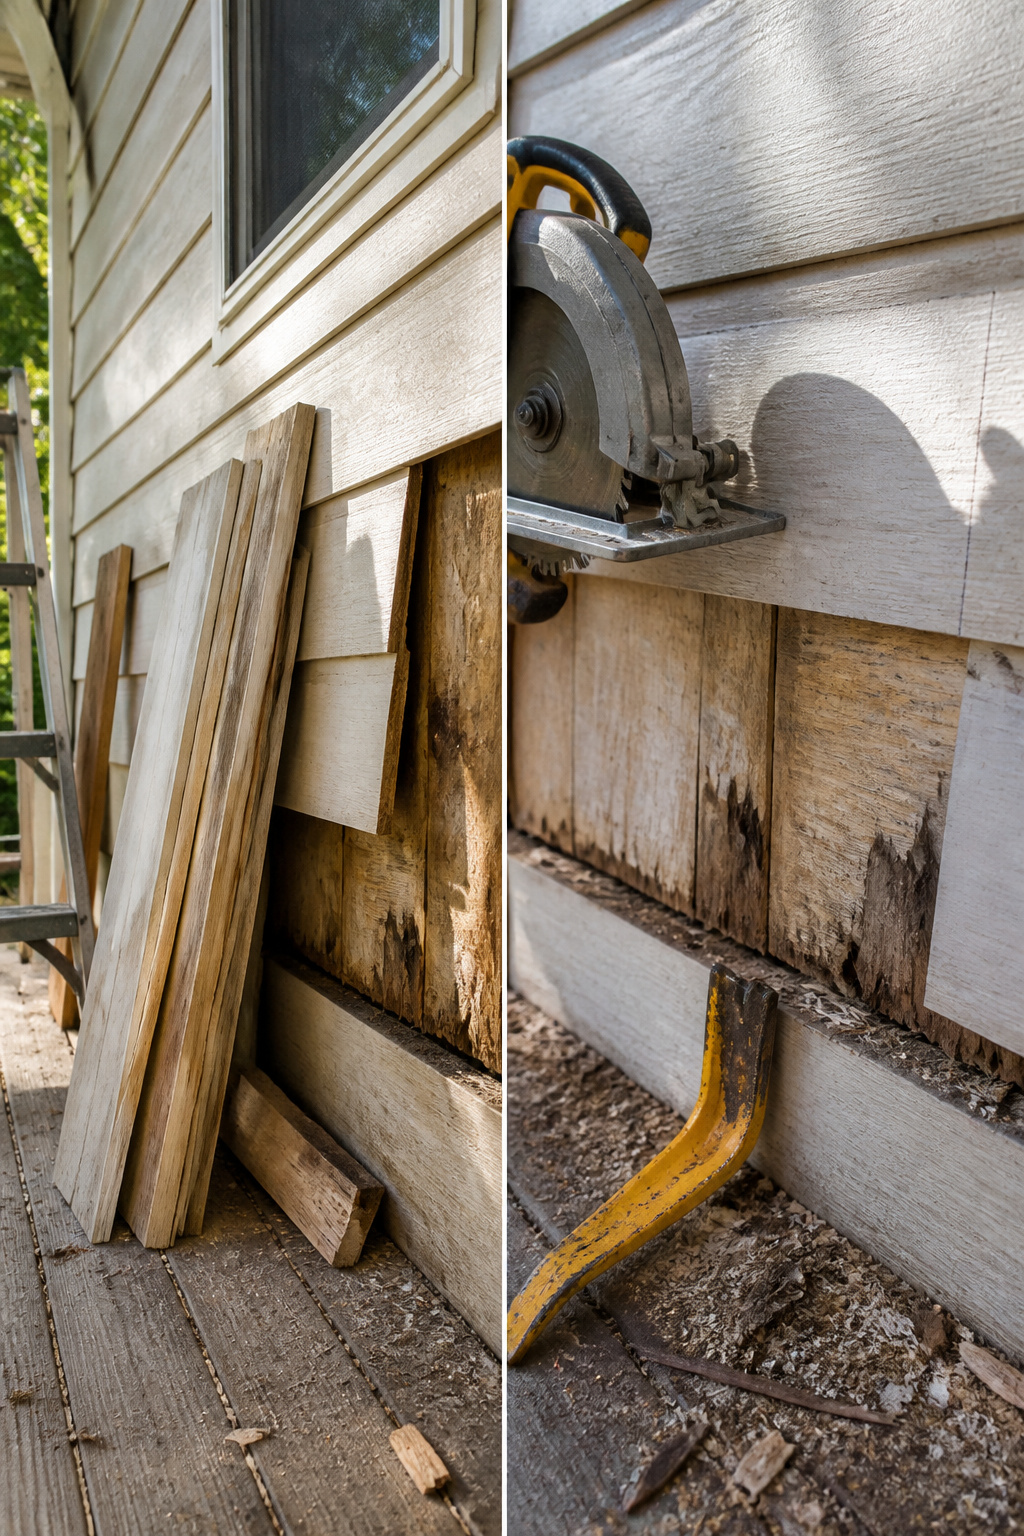
Set your circular saw to the depth of the siding so the blade just kisses through the board without chewing into the vapor barrier behind it. Run the cut up the middle of the damaged board, then work a pry bar in from the edge and lever the halves out. The kerf in the center gives the board somewhere to fold, which keeps the pry bar from levering against the tongue of the neighbor board and snapping it.
A Roto-Zip will cut cleaner edges if you are only chasing out a pocket of rot and want to graft in a Dutchman patch. The bit follows the grain with less tear-out than a circular saw blade. I still reach for the saw first, because full board replacement is what this siding usually needs once water has gotten in, and the saw moves fast down a straight run. The Roto-Zip earns its keep on detail work, not on stripping out whole courses.
Pull every nail or staple you find; even a buried fastener will stop the new board from seating flush. Order extra lumber before you start, because the pry bar will claim a few good boards no matter how careful you are.
Replace Vapor Barrier as Needed
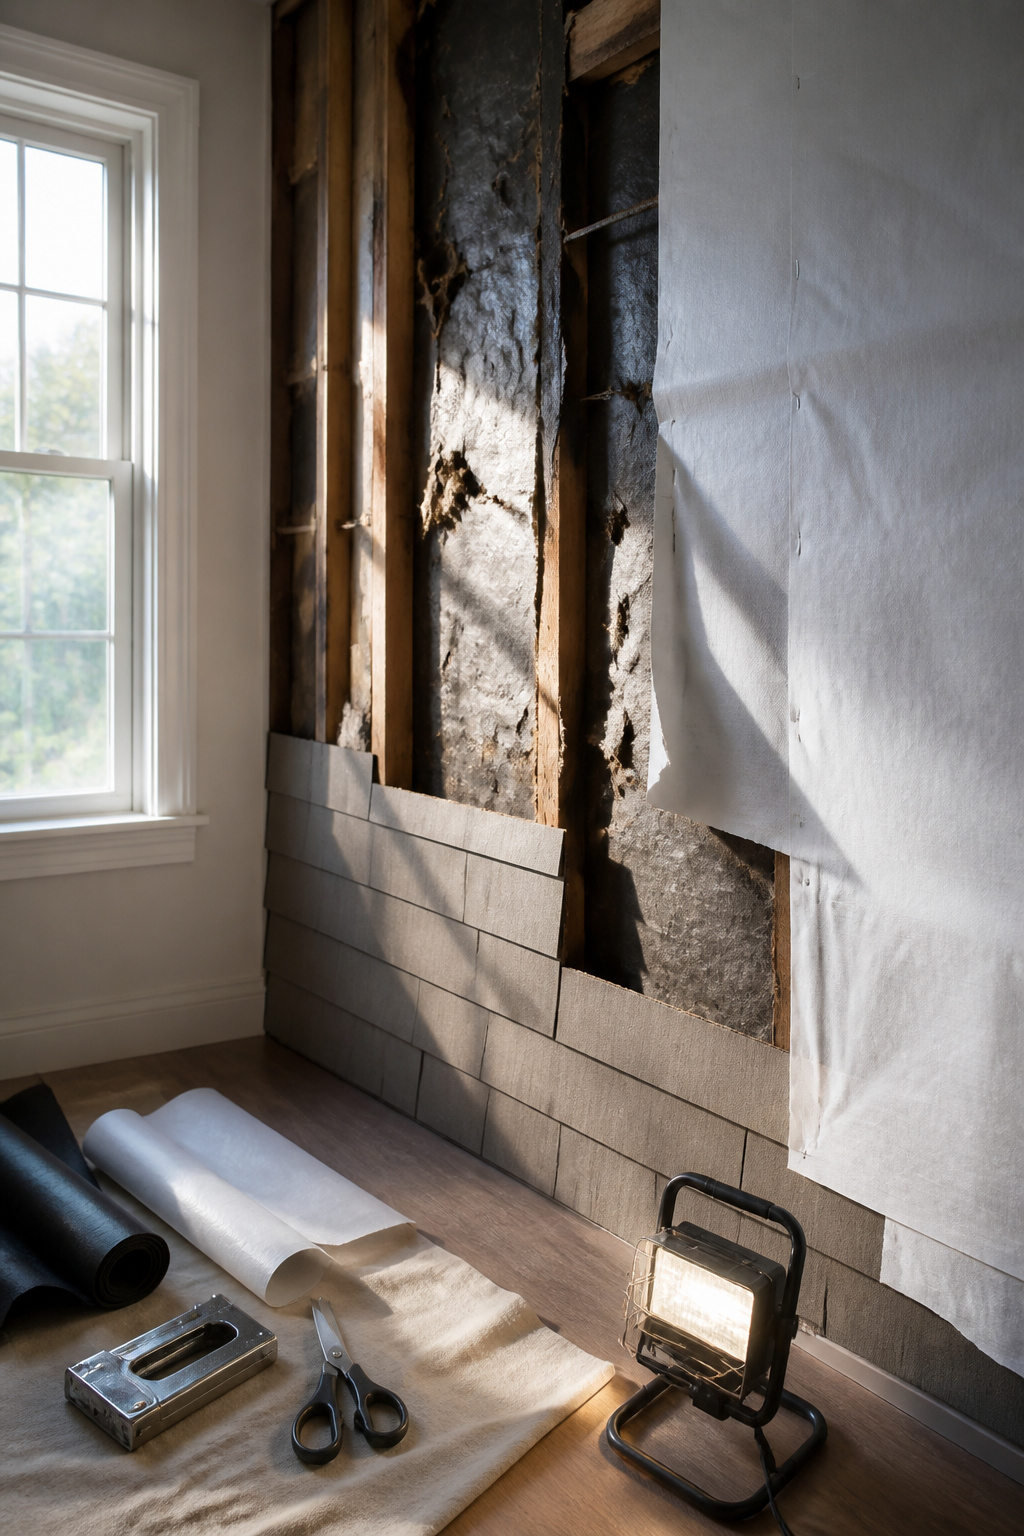
Once the old board comes free, the real damage shows up in strips. Black felt or house wrap behind it may be intact, or it may be split where the pry bar worked, which is the opening water needs to find the framing. I hold a work light at an angle and look for tears, thin spots, or gaps where the staple line gave way. Anything compromised gets cut out back to sound material.
New barrier goes up with at least a six-inch overlap over the piece below it, shingle-style so water runs past the seam rather than into it. I slide the top edge under the existing wrap on the course above when I can reach it, then staple every eight inches or so along the edges and through the field. Skipping this step or butting two pieces edge-to-edge leaves a channel that funnels water straight to the rot you are trying to fix.
Cut Your Boards to Size

Measure the opening from the top of the course below to the underside of the board above, then add about an inch so you have material to trim for a clean bottom edge. Working from the longest gaps down to the shortest lets you match each opening to the longest leftover board that fits it, which saves the shorter stock for the spots that actually need it.
The eighth-inch expansion gap belongs at the ends of each board, not along the long edge where the tongue and groove meet. I like to cut it in now with the miter saw set just shy of my final mark, since freehanding a gap with a circular saw later tends to wander. If you do leave the board long and plan to trim on the wall, mark the gap with a pencil and use a jigsaw or handsaw for the last bit; the circular saw is too bulky for that fine adjustment against existing siding.
Insert New Boards
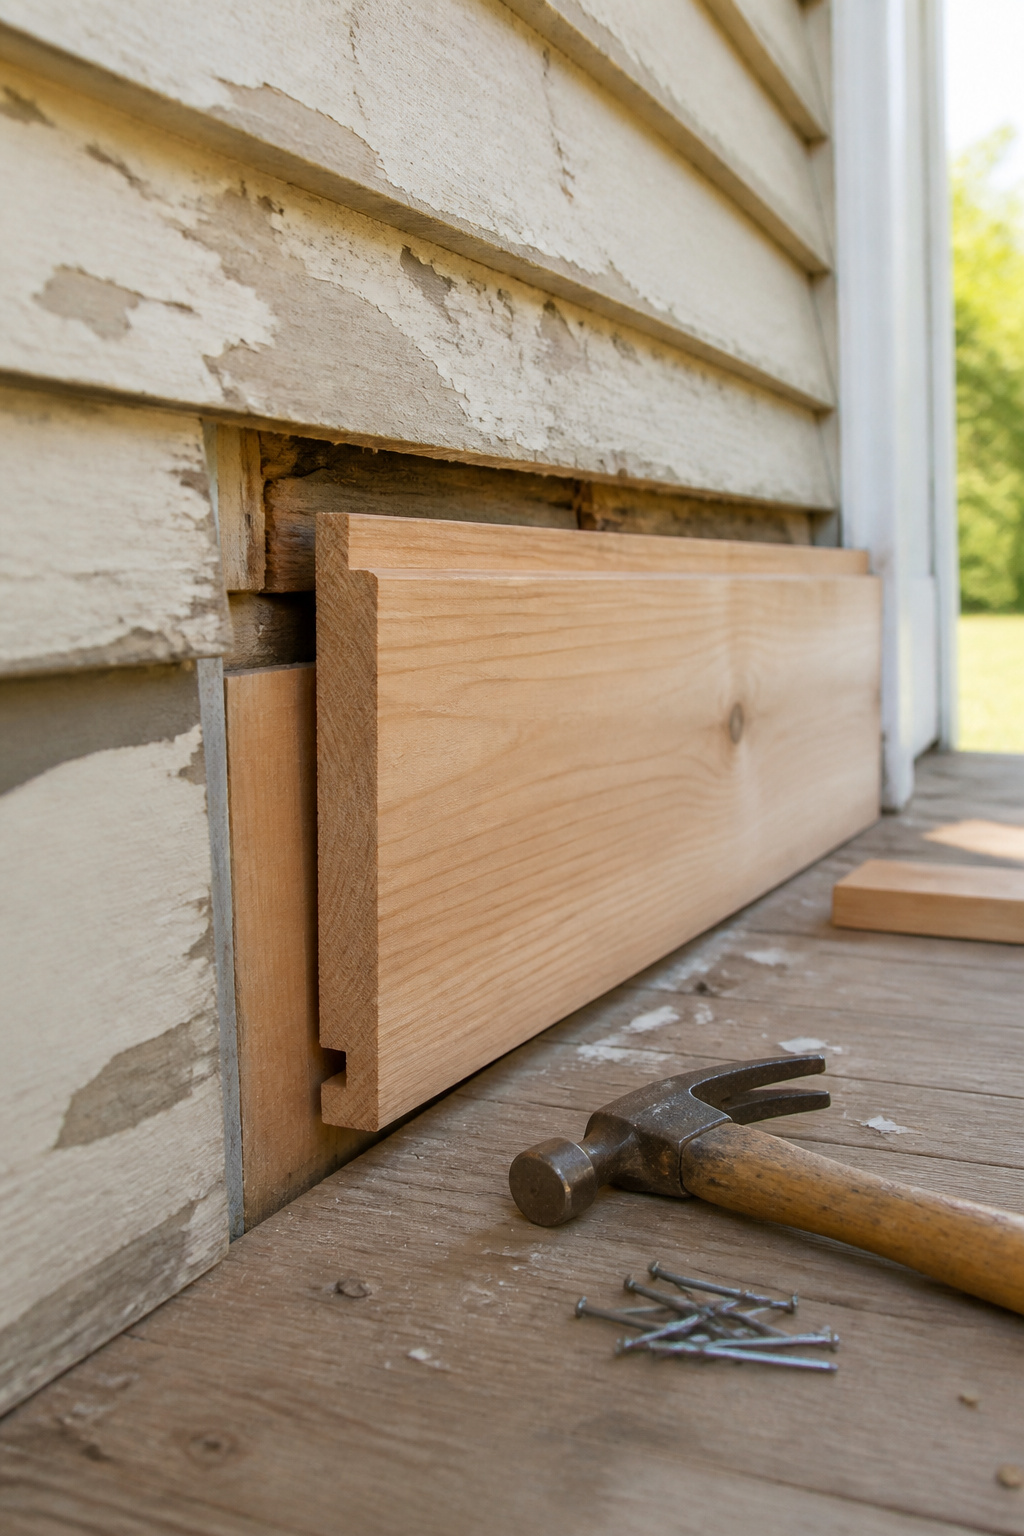
The tongue on your replacement board slides into the groove of the existing course above it. That part is straightforward. What trips people up is the board below, whose tongue is already locked into the wall and cannot move. You will need to cut the back lip off the groove of your new board so it can drop down over that existing tongue rather than sliding in end-first.
Set your circular saw to the depth of just the back portion of the groove, not the front face. Slice carefully, leaving the front half of the groove intact. This modified groove now acts like a hook: the tongue above seats normally, while the cut groove below presses flat against the existing tongue and covers it visually.
If you are replacing several boards in a row, only the last board needs this modification. Work your way across, inserting whole boards one at a time, blind-nailing through each tongue so the next groove hides the fastener. On that final board, face-nail through the face itself where the groove had to be cut, then paint the nails to match. Space nails about two feet apart, and use stainless steel; other metals will bleed stains through your paint in a season or two.
Cut Any Uneven Edges

A board that looks straight against the tape measure can still read crooked once it is nailed in with four others, especially on an old wall where the original line has bowed over decades. The last repair I did, three replacement boards met the original siding at slightly different depths because the house had settled. Running a circular saw along the bottom edge cleaned the line in one pass. I used a 2×4 as a straightedge guide, clamped flush to the cut line so the blade could not wander into the old boards. Leave the new boards a little long when you first measure and cut them; that margin is what lets you true the line at the end rather than discovering a gap too late. The saw kicks up dust against old paint, so eye protection matters more here than during the demo. Once the edge is even, the repair disappears into the wall.
Materials and Tools

Every guide lists the obvious tools and misses the one that saves your afternoon. Here is what actually belongs on the sawhorses.
- Stainless steel nails for any exposed fastening. Galvanized fasteners will bleed dark streaks through paint or stain inside two seasons. The extra dollar per pound is cheaper than a second ladder trip.
- 1-1/4 inch galvanized staples for blind nailing into the tongue. Set them every 12 inches. A staple gun with an angled nose drives them flush without the hammer gymnastics.
- Circular saw, pry bar, hammer, tape measure. The pry bar wants to be flat and wide, not curved; curved bars crater the sheathing underneath.
- A nail set you will actually use. Starting nails with a hammer is standard, but seating them flush in the groove without one splits tongues. I keep two sets, one for 4d and one for 6d, because switching mid-course wastes the rhythm.
- Scrap boards for angle matching. Cut a test piece, walk it to the wall, and mark the next board’s long point or short point from the fit. This beats carrying a tape up and down the ladder for every course.
Wider 1×8 boards need face nailing with two fasteners per stud, not blind nailing. The expansion across a humid August will work a single staple loose.
Nailing and Fastening

Blind nailing hides every fastener behind the next board’s groove, which is why I favor it whenever the material allows. Boards up to 6 inches wide (nominal) take one siding nail per bearing point, driven at a 45-degree angle through the tongue base. The 12-inch spacing rule keeps the run tight without overworking the wall; anything wider and the boards fight back too hard against seasonal movement.
Wider stock changes the game entirely. A 1×8 expands and contracts enough that face nailing becomes the safer call, with two nails at each fastening point rather than one. Either way, the fastener needs 1-1/4 inches of bite into solid wood behind it, whether that means studs or furring strips. Galvanized staples can substitute if you are working with cedar and have a narrow-crown stapler on hand, though stainless steel nails outlast everything else in exterior use.
The angled entry matters. Start the nail with a hammer, set it flush to the groove surface with a nail set, and the next board’s groove slides over the head like it was never there. If the wood keeps splitting on you, a narrower shank finish nail usually solves it.
Moisture Protection
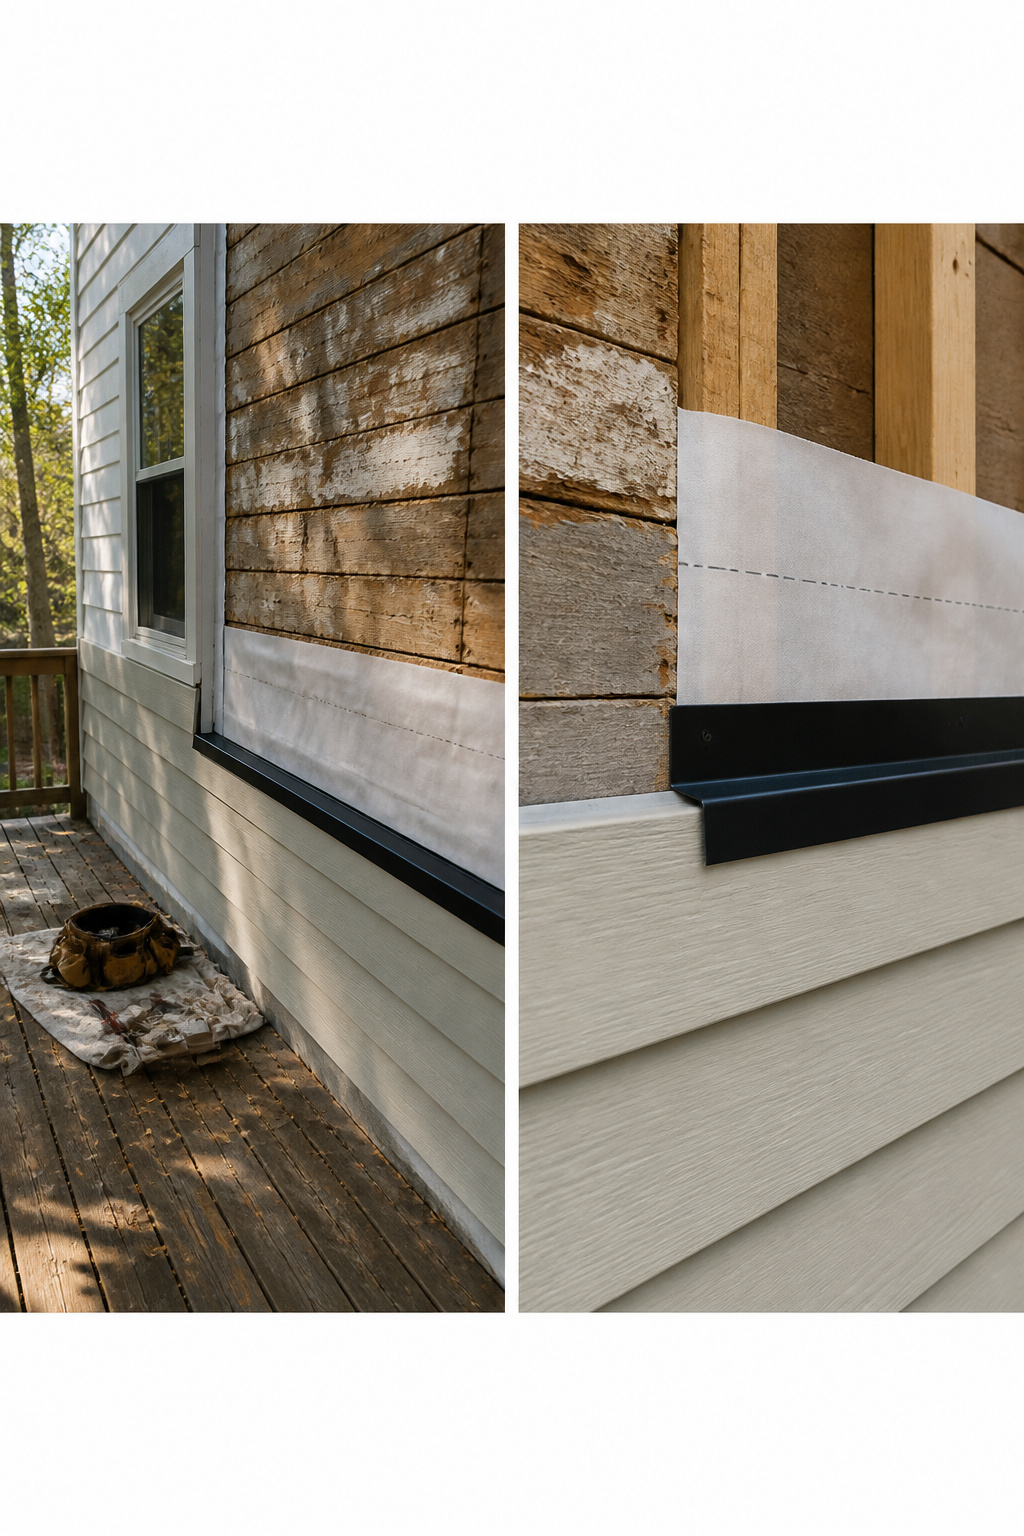
Flashing belongs at every horizontal joint where old siding meets new, and anywhere the wall changes direction or meets a roofline or window head. On a repair job, the existing wall has already proven it can trap water, so the drainage plane matters more here than it does on new construction where everything started clean.
House wrap laps over the top edge of the flashing like a shingle over a lower shingle, directing any water that gets behind the siding out and down. The bottom edge of the wrap stays exposed to the flashing, never tucked underneath it, or water runs straight behind the barrier you just installed. I learned this the hard way on a garage repair where I got the sequence backward and had to pull three courses to redo it.
Because this wall failed once, the sheathing underneath may be uneven or patched, which creates low spots where water pools. Flashing needs to sit tight to the surface, not bridge across gaps. If the old sheathing is cupped or rotted, fix that first. A layer of new protection over a wavy wall still leaves pockets where water sits, and the second failure is always worse than the first because the rot spreads to framing that was sound before.
Installation Direction and Angle Cuts

Horizontal runs start low and stack upward with the groove edge facing down, each board blind-nailed through the tongue at a 45-degree angle. One nail per bearing point works for boards up to six inches nominal; anything wider needs face nailing to hold flat. Stainless steel nails outlast the alternatives, and if the wood starts splitting under the hammer, a narrower shank finish nail usually solves it.
Vertical layout flips the logic. The first board goes at a corner with its grooved edge toward that corner, and getting it plumb matters more than getting it fast, since every board after follows its line. Blocking between studs or furring strips give you something to nail into; without them, the siding has nowhere to anchor.
The angled cut that actually trips people up is the one where boards meet a pitched roofline. On a 3-pitch roof, that angle works out to 15 degrees. A bevel tool copies the roof angle straight to your saw blade, but I prefer cutting one scrap, testing the fit, then using that board as a pattern: measure the long point of the cut board, mark the next board’s short point at that same length, and cut. Stack four or five boards on a flat surface, mark them all at once, and you save yourself the walk back to the saw for every single piece.
Staining to Match Old and New

New cedar boards drink stain differently than siding that has spent fifty years baking and graying in the weather. The old wood has already lost its surface oils and opened up in the cycle of wet and dry, so a single coat can look flat and even while the same product on fresh boards turns darker and patchier. Opaque stain is what closes that gap. It sits on the surface rather than soaking in, building a skin of color that reads the same across old and new boards. After a few weeks of curing, the wall looks like one plane instead of a patch job waiting to weather in. This part of the repair is patience and appearance, not structure; the boards underneath are already sound and sealed. If you are working with a tight weekend and the siding is otherwise solid, the stain layer is where the money shows. Skip the transparent or semi-transparent products for this repair. They let the grain show, but they also let the age difference show, and that difference will linger for years.
When to Repair Versus Replace Everything

A single soft board near the ground is a Saturday fix. Pull it, slip in the replacement, and the wall goes on looking like itself. But the same rot pattern showing up in a dozen spots along the foundation line means the wall is telling you something bigger. At that point, patching starts to look like chasing symptoms while the disease keeps spreading.
Age matters too. My own read on this changed after watching a friend replace plank after plank on a forty-year installation. Fresh wood butted against boards that had grayed and shrunk to a different dimension, and the patchwork never quite settled. The tongue-and-groove join needs adjacent boards to share the same moisture content and wear cycle, or the interlock stresses in opposite directions.
The vapor barrier behind the siding is the detail that usually decides it. Torn black paper under one board gets patched with an overlap and staples. Tear it up in six places, though, and you are doing surgery on the whole building envelope one board at a time. That is the line I would draw: spot repair when the barrier behind is mostly intact and the rot is isolated, full replacement when the failure pattern repeats and the hidden layer needs rebuilding along with the face you see.
Frequently Asked Questions
How do you replace damaged tongue and groove siding?
Set your circular saw to the depth of the siding and cut down the center of the damaged board, then pry out the halves with a flat bar. For the new board, you need to cut the back lip off its groove so it can drop over the existing tongue below while its own tongue seats into the groove above. Blind-nail through the tongue at a 45-degree angle, and face-nail the last board in a run where the groove had to be modified.
What type of nails should be used for tongue and groove siding?
Stainless steel nails are the only choice for any exposed fastening; other metals bleed dark stains through paint or stain within two seasons. For blind nailing into the tongue, 1-1/4 inch galvanized staples every 12 inches work well with a narrow-crown stapler. A nail set is essential to seat fasteners flush without splitting the tongue.
How do you ensure moisture protection when replacing siding?
Patch or replace torn vapor barrier with at least a six-inch overlap, shingle-style so water runs past the seam. Install flashing at every horizontal joint and where the wall meets rooflines or windows, with house wrap lapping over the top edge of the flashing. Never tuck the bottom edge of wrap under flashing, or water runs behind the barrier you just installed.